iv Contents
Contents (continued)
Paragraph Page
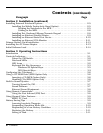
Section 2 Installation (continued)
Installing External Notebook Options - - - - - - - - - - - - - - - - - - - - - - - - - - - - - - 2-5
Installing the Mobile Productivity Base (Option) - - - - - - - - - - - - - - - - - - - 2-5
Docking the Notebook to the MPB - - - - - - - - - - - - - - - - - - - - - - - - 2-5
Cabling to the MPB - - - - - - - - - - - - - - - - - - - - - - - - - - - - - - - - - - 2-6
Installing Ext. Keyboard/Mouse/Numeric Keypad - - - - - - - - - - - - - - - - - 2-8
Installing an External Parallel Printer - - - - - - - - - - - - - - - - - - - - - - - - - - 2-9
Installing an External Serial Port Device - - - - - - - - - - - - - - - - - - - - - - - 2-10
Installing an External VGA Monitor - - - - - - - - - - - - - - - - - - - - - - - - - - 2-11
Primary Battery Pack Installation- - - - - - - - - - - - - - - - - - - - - - - - - - - - - - - - 2-13
Installing the AC Power Adapter - - - - - - - - - - - - - - - - - - - - - - - - - - - - - - - - 2-13
Initial Software Load - - - - - - - - - - - - - - - - - - - - - - - - - - - - - - - - - - - - - - - - 2-14
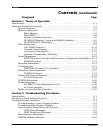
Section 3 Operating Instructions
Introduction - - - - - - - - - - - - - - - - - - - - - - - - - - - - - - - - - - - - - - - - - - - - - - 3-1
Controls/Indicators - - - - - - - - - - - - - - - - - - - - - - - - - - - - - - - - - - - - - - - - - - 3-1
Power On/Off Switch - - - - - - - - - - - - - - - - - - - - - - - - - - - - - - - - - - - - - 3-2
Notebook LEDs - - - - - - - - - - - - - - - - - - - - - - - - - - - - - - - - - - - - - - - - - 3-2
LED Icons - - - - - - - - - - - - - - - - - - - - - - - - - - - - - - - - - - - - - - - - - - - - 3-2
Keyboard Hot Key Sequences - - - - - - - - - - - - - - - - - - - - - - - - - - - - - - - 3-3
Windows 95 Special Keys - - - - - - - - - - - - - - - - - - - - - - - - - - - - - - 3-5
DOS Special Keys - - - - - - - - - - - - - - - - - - - - - - - - - - - - - - - - - - - 3-5
Configuring the Touchpad- - - - - - - - - - - - - - - - - - - - - - - - - - - - - - - - - - - - - - 3-6
Using a CD-ROM Drive (MPB Option Only - - - - - - - - - - - - - - - - - - - - - - - - - - - 3-6
Inserting a CD (MPB Option Only) - - - - - - - - - - - - - - - - - - - - - - - - - - - - 3-6
Handling CDs (MPB Option Only - - - - - - - - - - - - - - - - - - - - - - - - - - - - - 3-6
Built-In Sound System - - - - - - - - - - - - - - - - - - - - - - - - - - - - - - - - - - - - - - - - 3-7
Turning Sound On/Off- - - - - - - - - - - - - - - - - - - - - - - - - - - - - - - - - - - - 3-7
Sound Software - - - - - - - - - - - - - - - - - - - - - - - - - - - - - - - - - - - - - - - - 3-7
External Sound Equipment- - - - - - - - - - - - - - - - - - - - - - - - - - - - - - - - - 3-8
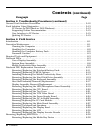
Using Remote Connections - - - - - - - - - - - - - - - - - - - - - - - - - - - - - - - - - - - - - 3-8
Using the Fast Infrared (FIR) Port- - - - - - - - - - - - - - - - - - - - - - - - - - - - - 3-8
Using Zoomed Video Features - - - - - - - - - - - - - - - - - - - - - - - - - - - - - - - - - - - 3-9
MPEG PC Card - - - - - - - - - - - - - - - - - - - - - - - - - - - - - - - - - - - - - - - - - 3-9
Battery Saving Tips - - - - - - - - - - - - - - - - - - - - - - - - - - - - - - - - - - - - - - - - - - 3-9
Lowering Inactivity Timeouts- - - - - - - - - - - - - - - - - - - - - - - - - - - - - - - - 3-9
Suspending Operation While Idle - - - - - - - - - - - - - - - - - - - - - - - - - - - - 3-10
Responding to a Low Battery Condition- - - - - - - - - - - - - - - - - - - - - - - - 3-10
Replacing the Battery- - - - - - - - - - - - - - - - - - - - - - - - - - - - - - - - - - - - 3-11
Saving to Disk - - - - - - - - - - - - - - - - - - - - - - - - - - - - - - - - - - - - - - - - 3-11


