Section 3: Operation
013-100149-02 Rev. 1 (01/07) Christie DS+60/DW30/Matrix 3000 User’s Manual 3-3
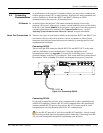
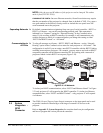
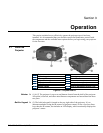
(6) & (11) The two IR sensors located on the projector receive transmissions from the
IR remote from up to 100 feet away. It is important to keep the transmission path to
these sensors unobstructed for uninterrupted communications with the projector. The
front IR sensor is located next to the projector’s nameplate and the rear IR sensor is
located just below the input panel.
(13) & (14) Located on the right hand side of the projector are two lamp doors that are
labeled as Lamp #1 or Lamp #2. Each door is fitted with an amber window that makes
it easy to identify which lamp because it will glow. NOTE: It is important to always
check the status of the lamp before opening the lamp door. Opening a lamp door
while the lamp is still on will cause power to be cut to that lamp.
(15) Use the following slot to install a standard Kensington lock to keep your
projector secure in some installations.
Laser radiation is emitted from the laser diode in the remote. Do not look
directly into the beam of the remote.
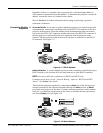
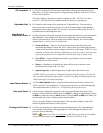
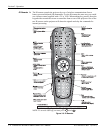
The projector is typically controlled using one of the following keypads:
• Built-in Keypad located on the top, right edge of the projector
• IR Remote for wired or wireless control up to 100 feet away (includes cable for
use as a wired remote)
While each of the keypads provides complete control of the projector, they differ
slightly in their arrangement of keys and in what functions can be accessed directly
with a key press rather than requiring use of the menu system. You may find one
keypad more convenient than another for your specific installation and application.
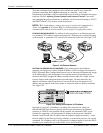
NOTE: The IR remote has a single IR protocol. It can be converted to a wired IR
remote by connecting the cable provided with the projector to the mini stereo
connector labeled
REMOTE on the input panel.
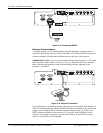
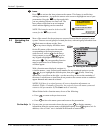
To control the projector when
signals from an IR remote
cannot reach the projector,
use the projector’s built-in
keypad. Two nearby status
windows provide feedback
indicating current status and activities of the projector. Because the built-in keypad
has fewer keys than the remote control, certain projector functions are accessible only
through the menu system rather than via a direct key.
Refer to the key descriptions provided for the IR remote.
Front & Rear IR Sensors
f
Lam
p
Access Doors f
Kensin
g
ton Securit
y
Slot f
3.2 Using the
Remote or
Built-In Keypad
Ke
yp
ad Commands f
Built-in Ke
yp
ad f
Figure 3.2. Built-in Keypad


