


Chapter 2 Printer Installation
25
2.8.2 Installing the Ribbon
Plate
WARNING!
During normal printer operations, the print head will become hot. Care
should be used when handling the print head to avoid personal injury.
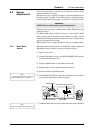
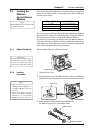
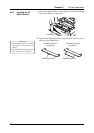
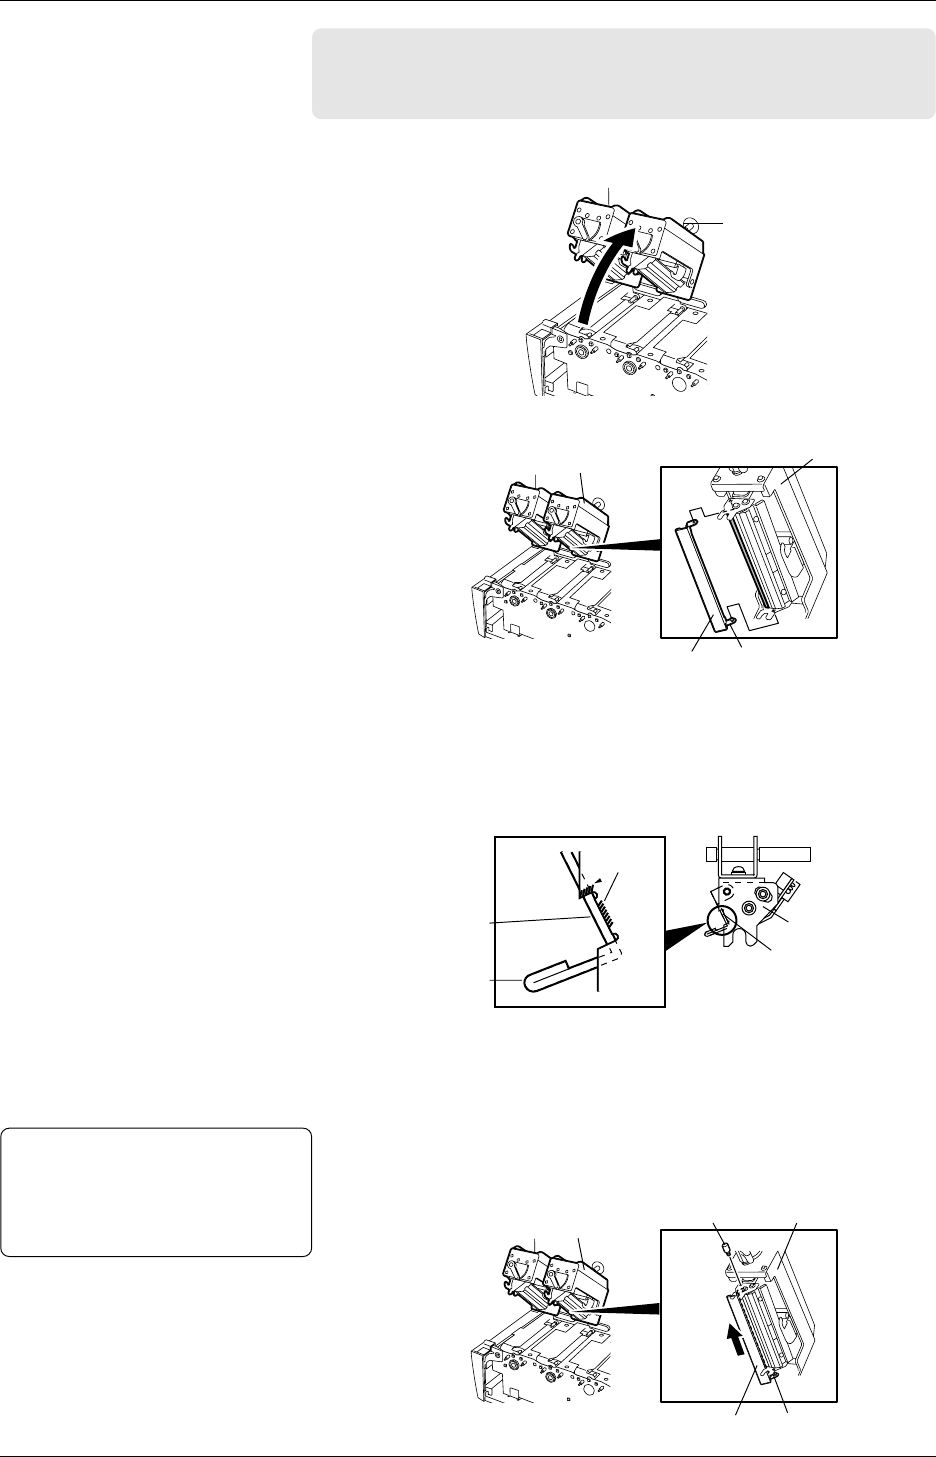
1
Remove all Ribbon Modules from the print head blocks. Then
lift one of the print head blocks.
Notes:
• Be sure to return the print head to
the original position.
• Tighten the screws so as not to
damage the screw threads.
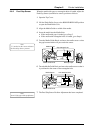
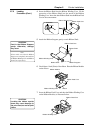
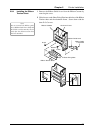
2
Hold the Ribbon Plate with the pin facing inside and downwards,
as illustrated below.
3
First position the Head Positioning Plate (opposite the pin side),
into the small rectangular groove. Keep the Head Positioning
Plate flush against the groove, as illustrated below.
When attaching the Ribbon Plate to the print head block, make
sure that the Head Positioning Plate makes full contact with the
small rectangular groove.
(Side View of Print Head Block and Ribbon Plate)
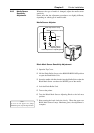
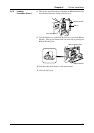
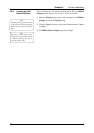
4
Slide the Ribbon Plate down slightly and insert the pin into the
hole on the back of the print head.
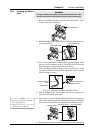
5
After the pin is inserted, slide the Ribbon Plate back in the direction
of the arrow and gently pull down the print head. Secure the Ribbon
Plate to the print head block by tightening the Mounting Screw.
6
Repeat this procedure for installation of the other three print heads.
Print Head Block
Print Head Block
Print Head Block
Pin
Ribbon Plate
Print Head Block
Ribbon Plate
Groove
Head Positioning
Plate
Ribbon Plate
Print Head Block
Mounting Screw
Pin
Ribbon Plate
Print Head Block