


31472AB 47
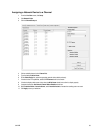
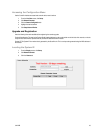
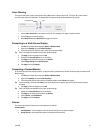
Voice Warning
The recorder allows users to play a sound file when either a Motion event or Sensor event occurs. This file can be a custom created
sound file that is unique to the application. The selected WAV file is played through speakers attached to the recorder.
1. Click the Open Sound File icon to browse for a WAV file. The selected file will display in the box on the left.
2. Click the Test icon to verify the audio file.
3. Select Motion Event and/or Sensor Event to trigger the audio file.
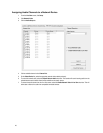
Connecting to a Wide Screen Display
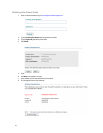
1. Click Exit on the Display screen and select Restart in Windows Mode.
2. Right-click the Desktop and select Screen Resolution.
3. From the Resolution list, select the proper solution of the connected display.
Tip Refer to the display documentation for the proper resolution settings.
4. Click Apply, confirm the change, then click OK.
5. Double-click the Surveillix Server icon on the Desktop.
6. Click Setup on the Display screen and then click General.
7. Under Display Settings, select Use Full Screen.
8. Click Apply then click Exit Setup.
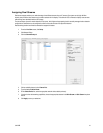
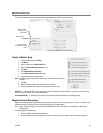
Connecting a Second Monitor
All recorders can support two connected monitors. If a second monitor is connected to the recorder, follow these steps to enable the Dual
Monitor settings.
1. Click Exit on the Display screen and select Restart in Windows Mode.
2. Right-click the Desktop and select Screen Resolution.
3. Click the secondary display screen and from the Multiple displays list click Extend these displays.
Tip If a second display is not shown click Detect; if the second display does not appear, verify that the second monitor is properly
connected.
4. Click Apply, confirm the change, then click OK.
Tip Refer to the display documentation for the proper resolution settings.
5. Double-click the Surveillix Server icon on the Desktop.
6. Click Setup on the Display screen and then click General.
7. Under Function, select Dual Monitor.
8. Click Apply then click Exit Setup.
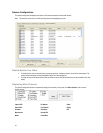
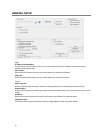
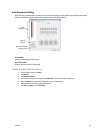
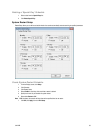
Volume
The volume control allows fine tuning of the volume settings on the recorder.
Volume Options:
• Device/Speakers – Used to adjust the volume for all sound coming from the system’s speakers.
• System Sounds – Used to adjust the volume for the system sounds exclusively.
Open Sound File
Test