


31472AB 79
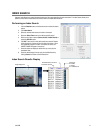
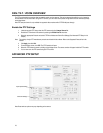
Creating and Viewing Preset Positions
A Preset Position is a user-defined location where the camera can be pointed, zomed-in, and focused. Preset postions can be defined
and labeled if the camera supports this.
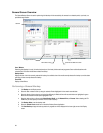
Creating a Preset
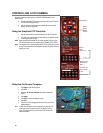
1. Inside Setup, click PTZ and select the camera.
2. If the camera is already selected, click Open PTZ Controller.
3. Move the selected camera to the desired position using the Pan/Tilt/Zoom/Focus controls.
4. In the Preset & Tour Detail section, choose a Preset # (1-10) using the list or the Right and Left Arrow buttons and click
Select.
Note Preset positions can be created using the advanced buttons on the PTZ graphical controller.
Viewing a Preset
1. From the Display screen, select the PTZ camera by clicking on it.
2. Using the keyboard, click the number keys corresponding with the Preset Positions. The camera will move to the saved Preset.
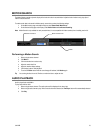
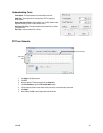
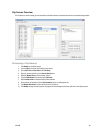
PTZ Address Settings
• Some protocols support software address settings.
• The RX-Addresses and ID settings are compatible with a particular line of receivers that support 2 ID addresses.
• The PT Driver Address is associated with the PTZ ID address set on the camera. The addresses must match for the recorder
to communicate with the proper PTZ camera. This is especially important when a large number of PTZ cameras are connected
to the recorder.
Note To select a PT Driver Address of 129-256, manually enter the ID in the box.
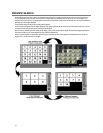
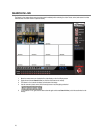
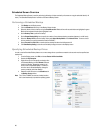
ACCESSING PTZ MENUS
• Some protocols support the ability to access the Internal PTZ Onscreen menu.
• Since every PTZ camera is different, the function of these options can vary slightly.
• The Surveillix recorder provides an easy way to access the camera options. For explanations of what those options are, please
refer to the user manual for the camera.
Note Use the arrow buttons on the PTZ controller to move through the PTZ menu options and/or highlight options.