


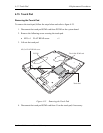
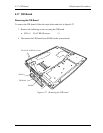

4 Replacement Procedures 4.14 Top Cover with Display Assembly
Installing the Top Cover with Display Assembly
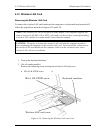
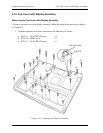
To install the top cover with display assembly, follow the steps below and refer to figures
4-23 and 4-24.
1. Install the top cover on the display assembly.
NOTE: When installing the top cover on display assembly, be careful to pinch
the wireless LAN or Bluetooth antenna coaxial cables.
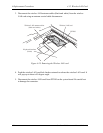
2. Press along the edges of the top cover with display assembly to secure latches.
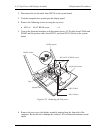
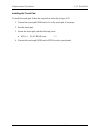
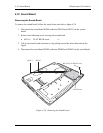
3. Turn up the keyboard insulator and connect the two LCD cables to PJ5600 (green)
and PJ5601 (white) on the system board.
4. Connect the speaker cables to PJ9512 (red) and PJ9513 (blue).
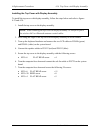
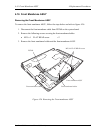
5. Secure the top cover to the display assembly with the following screws.
• M2.5×6 FLAT HEAD screw ×4
6. Turn the computer face down and connect the sub fan cable to PJ8770 on the system
board.
7. Turn the computer face down and secure the following 24 screws:
• M2.5×6 FLAT HEAD screw ×11
• M2.5×20 BIND screw ×8
• M2.5×4 FLAT HEAD screw ×5
4-44 Satellite A20 Maintenance Manual (960-444)