


35
Setting Up Your Scanner
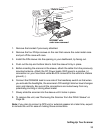
1. Remove the bracket if previously attached.
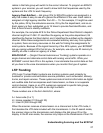
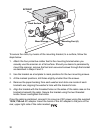
2. Remove the four Philips screws on the rear that secure the outer metal case
and pull off the case with care.
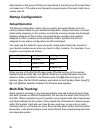
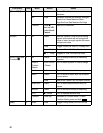
3. Install the DIN sleeve into the opening in your dashboard, lip facing out.
4. Push out the top and bottom tabs to hold the sleeve firmly in place.
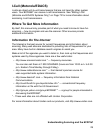
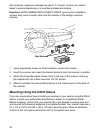
5. Before inserting the scanner in the sleeve, attach the cable from the previously
mounted antenna. Attach the DC Power leads. RED goes to a positive (+)
connection on your fuse block while BLACK connects to the vehicle’s chassis
ground (-).
6. Connect the ORANGE lead to one side of the headlamp switch so that when
you activate the headlights, the scanners LCD backlight dimmer level changes
color and intensity. Be sure all the connections are routed away from any
potentially pinching or slicing sheet metal.
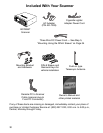
7. Slowly slide the scanner into the sleeve until it locks in place.
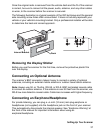
8. To remove the unit, see “Removing the Scanner from the DIN-E Sleeve” on
Page 36.
Note: if you plan to connect a GPS unit or external speaker at a later time, expect
to remove the unit for ease of making those connections.
DIN-E
Sleeve
Hole in dash
BCD996T with
outer case removed