c) Network Access: The PLS includes a default IP
address (192.168.168.168), which allows you to
contact the unit from any network node on the same
subnet. When the PLS is installed in a working
network environment, it is recommended that you
redefined the IP Address, Subnet Mask, and Gateway
Address as described in Section 5.6. To contact the
PLS via network, proceed as follows:
i. Telnet to the PLS's IP address. For example, if the
IP address is "192.168.168.168", then on a UNIX
system, the Telnet command would be invoked as
follows:
$ telnet 192.168.168.168 [Enter]
ii. Note that if the Telnet connection is refused, this
may mean that either the IP Security feature (see
Section 5.6.1), has denied the connection, or the
unit is operating on a 100BaseT network that does
not autosense for 10BaseT devices (see
Section 4.4.)
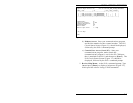
iii. If the System Password has been defined, the
password prompt will be displayed. Key in your
System Password or User Password and then press
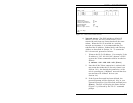
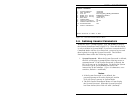
[Enter]. The PLS will display the Status Screen
(Figure 5.1), followed by the "PLS>" command
prompt.
5-3
Section 5: SetUp and Configuration
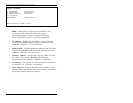
Physical Layer Switch v1.00 Site ID: PLS-345_TEST_IRVINE_CALIFORNIA
CKT# | From | To | POS | MON | Default |
-----+------------------+------------------+-----+-----+---------|
1 | PORT_1 | PORT_B | B | | A |
2 | PORT_2 | PORT_A |A|*| A |
3 | PORT_3 | PORT_A |A|*| A |
-----+------------------+------------------+-----+-----+---------|
Command Echo: On
Inactivity Timeout: 30 Min
Command Confirmation: On
Automated Mode: Off
Monitor Mode: On
Monitor Input Level: 1 - High
"/H" for help.
PLS>
Figure 5.1: The Circuit Status Screen


