4. Hardware Installation
4.1. Rack Mounting Installation
When installing the SRM-100 is an instrument rack, the following factors must be accounted
for:
1. Enclosed Racks: Enclosed racks must provide adequate ventilation. Make certain that
the rack is not overly crowded, and note that each unit in the rack generates its own heat.
An enclosed rack should have louvered sides and a fan to circulate cooling air. The
maximum temperature for the equipment in this environment is 45°C.
When mounting the unit in an enclosed rack with a ventilation fan at the top of the rack,
note that excessive heat generated by devices at the bottom of the rack can be drawn
upward and into the ventilation slots on units located at the top. Make certain to provide
adequate ventilation for equipment installed at the bottom of the rack.
2. Open Racks: Make certain that the rack frame does not block the ventilation slots on the
instrument cover. If the device is installed on sliders, check the unit when seated all the
way into the rack to make certain that ventilation slots are not blocked.
4.2. Connecting Power to the SRM-100
The SRM-100 is available in both AC and DC powered versions.
CAUTIONS:
• This device should only be operated with the type of power source indicated
on the instrument nameplate. If you are not sure of the type of power service
available, please contact your local power company.
• Reliable earthing (grounding) of this unit must be maintained. Particular
attention should be given to supply connections when connecting to power
strips, rather than direct connections to the branch circuit.
4.2.1. AC Powered Units
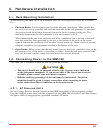
Set the Voltage Selector Switch (located on the SRM back panel) to the appropriate voltage.
Plug the supplied power cable into the receptacle on the SRM-100 back panel, and then connect
the power cable to an appropriate, grounded (earthed) AC outlet.
4-1


