


Scanning Overview
Xerox 6204 Wide Format Solution 83
Scan
4
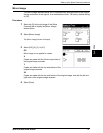
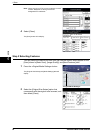
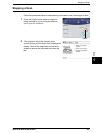
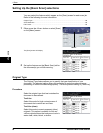
3 Select the required features from each tab of the
[Scan] screen.
Note: The features located on each tab are described later
in this chapter.
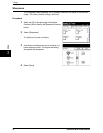
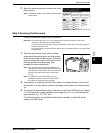
Step 3 Scanning the Document
Follow the procedure below to scan a document.
Important • A document jam may occur if you press down too hard on the original, pull it during
scanning, or release it before it stops feeding.
• To prevent document jams when copying originals that contain holes, orient the original so
that the holes feed in last.
• The original guide can be moved to the right to scan an oversized original, or an original with
hanging holes.
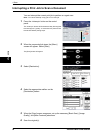
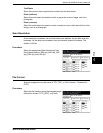
1 Orient the original face down, with one edge
aligned with the original guide, and then evenly
insert the lead edge into the scanner. When the
scanner detects the original it will feed it a short
distance (prefeed) and stop briefly, then
complete the scan automatically.
Note: If the document does not feed automatically, the
Scan Start mode may be set to [Manual Start]. In this
case, press the <Start> button. For more information
about the Scan Start mode, refer to "Scan Start"
(P.149).
Note: If a problem occurs during scanning, an error
message will appear on the touch screen. Solve
the problem as instructed in the message.
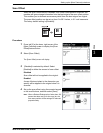
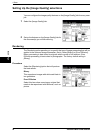
2 If the scanner is equipped with front return guides, the original will exit to the front of
the machine. You may wish to guide the lead edge of the original as it travels toward
you.
3 The system will automatically assign a file name, in the format “0000nnnn.xxx” (where
“n” is the sequential number assigned to the image file, and "xxx" is the selected file
type extension, e.g., TIF, PDF, etc.).
If the [Preview] option on the [More Features] tab is enabled, a thumbnail will be
created, in a.JPG format.