XEROX DOCUPRINT 180 LPS HARDWARE COMPONENTS
XEROX DOCUPRINT 180 LASER PRINTING SYSTEM PRODUCT GUIDE 3-7
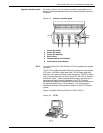
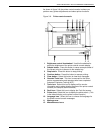
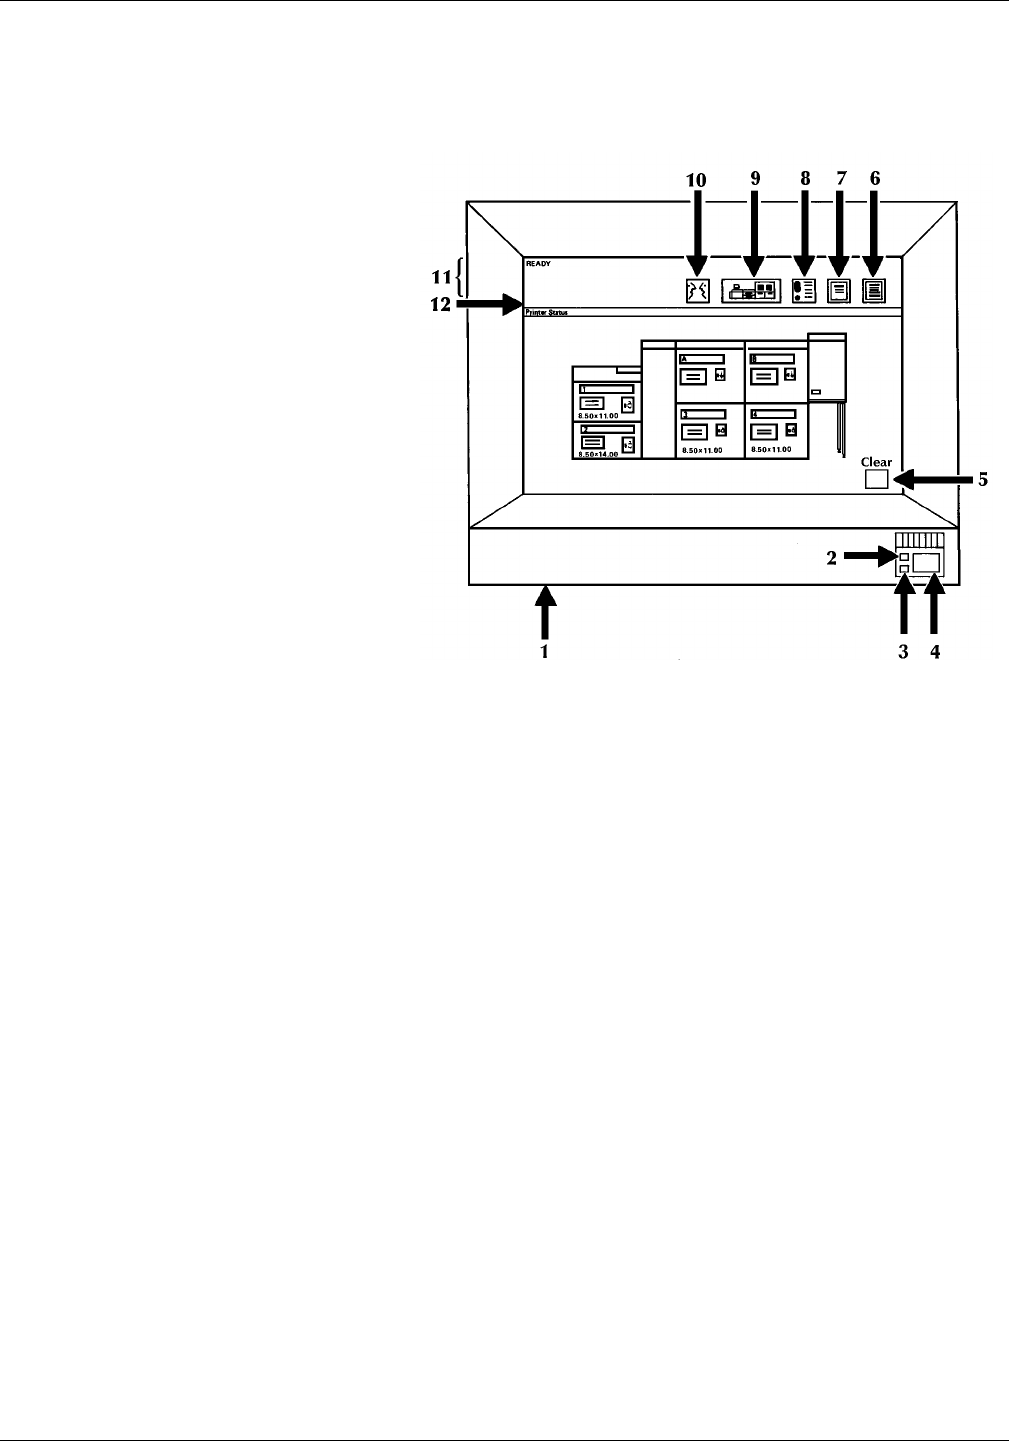
As shown in figure 3-8, the printer control console is where you
perform many printer adjustments and select printer functions.
Figure 3-8. Printer control console
1 Brightness control thumbwheel. Use this thumbwheel to
adjust the brightness of the printer control console display.
2 Sample button. Press this button to cause a sample sheet of
the current print job to be sent to the sample tray.
3 Stop button. Press this button to stop printing.
4 Continue button. Press this button to resume printing.
5 Clear button. Select this button to clear fault messages.
6 Guarded Tools icon. This icon is reserved for the Xerox
service representative and operators who have completed
Advanced Customer Training (ACT).
7 Tools icon. Select this icon to display call for service
information and to adjust display features of the printer control
console (for example, alarm loudness).
8 Fault icon. Select this icon to display the Fault List screen.
9 Printer icon. Select this icon to display the printer mimic. (This
is the default display on the printer control console.)
10 Language icon. Select this icon to choose the language for
the printer control console messages.
11 Message area.
12 Miscellaneous icons.


