PRODUCT DIFFERENCES/USER CONSIDERATIONS
5-24 XEROX DOCUPRINT 180 LASER PRINTING SYSTEM PRODUCT GUIDE
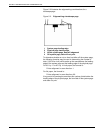
Thus, if you switch from 8.5- by 11-inch/216- by 279-mm to U.S. legal
(8.5- by 14-inch/216- by 356-mm), the 11-inch/279-mm segment is
utilized first, then the additional blade extension to 14-inch/356-mm
is activated automatically when the legal size paper is encountered.
Two points to note:
• For page lengths in between the preset blade lengths, there
may be some deletion on paper that extends past the blade.
The rate of occurrence of deletions varies widely, depending on
paper stock, and should be tested. Also, note that no deletion
will be noticed if no data is printed on the portion of paper that
extends past the blade.
If you frequently use non-standard size paper, a custom
transfer blade kit is available for installation on your printer. For
more information on the custom transfer assist blade, refer to
the
Xerox DocuPrint 180 LPS Operator Guide
.
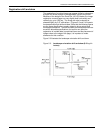
• The activation of the blade is timed to place it on the lead edge
of the sheet of paper as it moves through the system. The
placement of the activation can vary with the actual speed of
paper. Therefore, performance may demonstrate some
deletions on the lead 0.25-inches/6-mm of the page. In
particular, solid black lines on the lead edge of the page should
be avoided if this is a major concern to you.
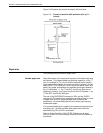
A consideration resulting from the very solid black characters that the
DocuPrint 180 LPS can print is that toner on the lead edge of the
paper may cause the sheet to stick to the fuser, due to the
consistency and solidness of the toner. In order to eliminate fuser
jams caused by this condition, the system uses a digital screen to
lighten automatically any solid areas printed in the first 0.25 inches/
6mm of the lead edge. If the solid areas are small, the amount of
screen is barely noticeable, if at all. However, with very large solid
black areas, the effect may not be acceptable. The system does
provide an override using the Lead Edge Screen window at the PC
UI, or the EDGE command entered at the command line. This
window or command allows you to enable or disable the lead edge
screen; however, overriding the screen in this manner is likely to
increase fuser jams.
For particular applications, it is recommended that you run test prints
both with and without the screen to ascertain which mode is most
appropriate for you.
For more information on the Lead Edge Screen window, refer to the
Xerox DocuPrint 180 LPS Operator Guide
or the
Xerox DocuPrint
180 LPS PC User Interface Reference
. For more information on
entering the EDGE command at the command line, refer to the
Xerox
DocuPrint 180 LPS Operator Guide
or the
Xerox DocuPrint 180 LPS
Operations Reference
.


