


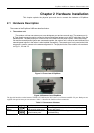
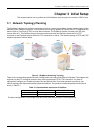

ExpWave 240B Secure Outdoor Ethernet Radio Link
2-4 Hardware Installation
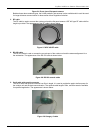
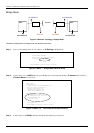
6. Grounding wire
The grounding wire is used to provide the grounding path for the outdoor unit to minimize the impact of
lightening and surge. The physical appearance of the grounding wire is shown below.
Figure 2-10 Grounding wire
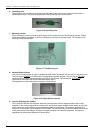
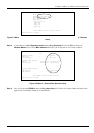
7. Mounting bracket
The mounting kit is used to provide a good support for the outdoor unit and the flat panel antenna. Please
follow the installation procedure to mount the outdoor unit and the flat panel antenna. The contents of the
mounting kit are shown below.
Figure 2-11 The Mounting kit
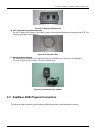
8. Network/Power Injector
The network /power injector is used to combine the data stream and power into one cable. It has three ports.
The port named POWER
is for 48V power from the switching power adapter. The port named TO LAN is
connected the customer premises equipment (CPE) by Cat-5 cable. The port named TO RADIO is
connected to the outdoor unit by the cable described in item 5.
The appearance of the network/power injector is shown below.
Figure 2-12 Network/Power Injector
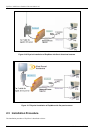
9. Antenna Alignment Kit (Option)
Two ExpWave 240B with the flat panel antennas should perform antenna alignment before the normal
operation. If the antenna alignment is not done well, the received signal strength will be smaller and the link
quality will be not good enough to support high-speed data communication. The antenna alignment kit is
connected to the outdoor unit through the RS-232 cable. You should modify the vertical and horizontal angle
of the panel antenna according to the signal strength indication of the antenna alignment. The physical
appearance of the antenna alignment is shown below.