


22 CHAPTER 3: CONFIGURING THE V7122 MEDIA GATEWAYS
Assigning an IP
Address Using HTTP
To assign an IP address using HTTP, perform these steps:
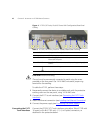
1 Disconnect the V7122 from the network and reconnect it to your PC
using one of the following two methods:
■ Use a standard Ethernet cable to connect the network interface on
your PC to a port on a network hub / switch. Use a second standard
Ethernet cable to connect the V7122 to another port on the same
network hub / switch.
■ Use an Ethernet cross-over cable to directly connect the network
interface on your PC to the V7122.
2 Change your PC’s IP address and subnet mask to correspond with the
V7122 factory default IP address and subnet mask (see
Restoring
Networking Parameters to their Initial State). For details on changing the
IP address and subnet mask of your PC, refer to Windows™ Online Help
(Start > Help).
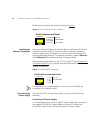
3 Access the V7122 first module’s Embedded Web Server (see Accessing
the Embedded Web Server).
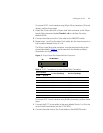
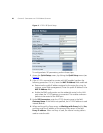
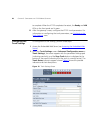
4 In the Quick Setup screen (Quick Setup menu), set the V7122 IP
Address, Subnet Mask, and Default Gateway IP Address fields under IP
Configuration to correspond with your network IP settings.
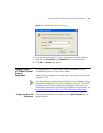
5 Click the Reset button, and then at the prompt, click OK; the V7122
applies the changes and restarts. This takes approximately three minutes
to complete. When the V7122 completes the reset, the Ready and LAN
LEDs on the front panel are lit green.
Record and retain the IP address and subnet mask you assign the V7122.
Do the same when defining new username or password.
6 Repeat steps 3 to 5 for the V7122 second module (if used).
7 Disconnect your PC from the V7122 or from the hub / switch (depending
on the connection method you used in
step 1).
8 Reconnect the V7122 and your PC (if necessary) to the network.
Default subnet mask is 255.255.0.0, default gateway IP address is 0.0.0.0
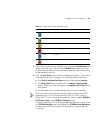
Table 5 V7122 Default Networking Parameters (continued)
V7122 Version Default Value