


Configuring Communication
34
TPI-PRO Total Presentation Interface - Pro Edition
10. Press the Domain field to open a keyboard, enter the resolvable domain address (this is provided by
your System Administrator and equates to a unique Internet name for the TPI-PRO.) Press Done
when complete.
11. Press the Back button to return to the Protected Setup page.
12. Press the on-screen Reboot button to both save any changes and restart the TPI-PRO.
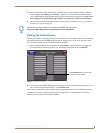
13. Navigate to the Master Connection section of this page to begin configuring the communication
parameters for the target Master.
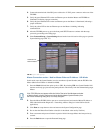
Step 2: Choosing a Master Connection Mode Setting
There are five Ethernet MODE settings used in the Master Connection section of the System Connection
page. URL is the most common method. The following table describes the master connection mode
options.
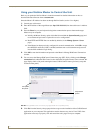
Step 3: Configuring the Ethernet Connection Type
Before beginning:
1. Verify the TPI-PRO has been configured to communicate through an Ethernet cable connected from
the rear of the TPI-PRO to a valid Ethernet Hub.
2. Verify that the NetLinx Master is receiving power and is communicating via an Ethernet connection
with the PC running NetLinx Studio.
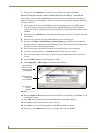
3. Connect the terminal end of the PSN power cable to the 12 VDC power connector on the rear of the
TPI-PRO unit.
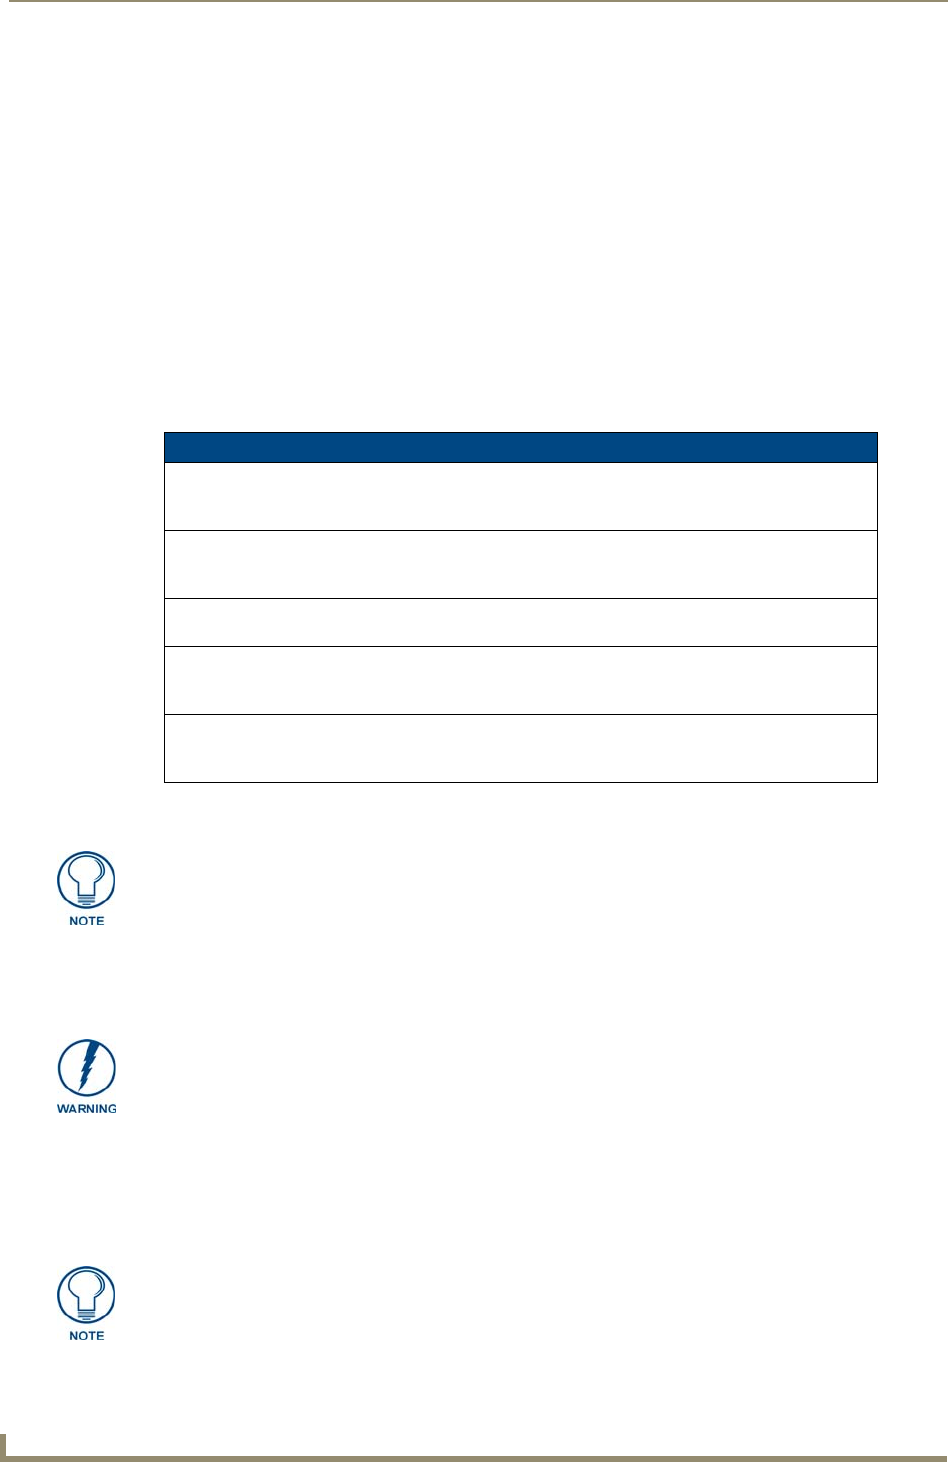
Master Connection Mode Options
URL (Uniform Resource Locator) is the address that defines the route to a file on the Web or any
other Internet facility. In this system, the panel acts as a "Client" and the Master acts as a Server (in
that Clients attach to it).
LISTEN sets the TPI-PRO to "listen" for connections from the Master (using the panel IP from its
URL list). In this system, the TPI-PRO acts as a "Server" (in that Clients attach to it) and the Master
acts as a "Client".
AUTO is used to instruct the TPI-PRO to search for a Master that uses the same System Number
(assigned within the Master Connection section) and resides on the same Subnet as itself.
NDP (UDP) uses multicasting to allow devices to discover each other. The devices must be on a
network that allows multicasting and is setup so that if the device and the Master are on separate
subnets, the multicasting allows them to discover each other.
URL (UDP) is the address that defines the route to a file on the Web or any other Internet facility. In
this system, the panel acts as a "Client" and the Master acts as a Server (in that Clients attach to it).
In this case, the Master has its UDP feature enabled.
When using Ethernet as your communication method, the NetLinx Master must first
be setup with either a static IP or DHCP Address obtained from either NetLinx Studio
or your System Administrator.
Before commencing, verify you are using the latest NetLinx Master firmware.
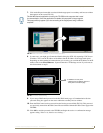
If you have not yet connected power and turned on TPI-PRO, continue with steps 4 -
7. These steps allow the panel to cycle through its available ports and detect any
attached connectors. Otherwise, skip to step 8.