


INSTALLATION 2.19
Reassembly
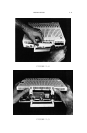
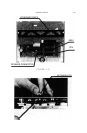
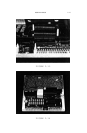
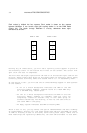
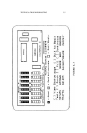
1. With the front of the //c facing you, insert the back of the keyboard into
the restraining slits on the disk drive case. The right end of the back of
the keyboard fits into the slit on the disk drive near the power supply and
the protrusion to the right of the keyboard connector cable fits into the
slit in the middle of the disk drive.
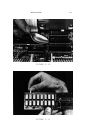
2. Replace the top cover. Insert the hook at the front end of the top cover
into the cutout for it on the keyboard. Do so by tilting the front end of
the top cover downward. Next, snap the case down at the rear corners. You
should hear a snap as the tabs on the cover lock.
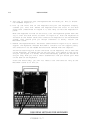
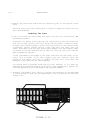
3. Turn the rear of the //c toward you. Replace the //c handle if you removed
it from the beck of the case. Reinsert the back cover. Snap the tabs of
the beck cover into place on the //c case.
4. Reinsert the six screws making sure the two wider thread screws are
returned to the two holes at the back of the case. Tighten the screws
securely. Don’t overtighten the screws or you may strip the hole's
internal threads.
You have successfully finished installing your MultiRam C Card.
You will not have to remove the //c’s case again unless you wish to add more
memory to the card. Simply install more memory on the card while it is inserted
into the motherboard; there is no need to remove the card from the motherboard
to insert an additional bank of RAM.