Chapter 2: Installation 13
Rack Mounting an AMX Switch
A rack mounting kit is supplied with each AMX switch. You may either place the AMX switch on
the rack shelf or mount the switch directly into an Electronic Industries Alliance (EIA)
standard
rack.
CAUTION: Rack Loading - Overloading or uneven loading of racks may result in shelf or rack failure, causing
damage to equipment and possible personal injury. Stabilize racks in a permanent location before loading
begins. Mount components beginning at the bottom of the rack, then work to the top. Do not exceed your rack
load rating.
CAUTION: Power Considerations - Connect only to the power source specified on the unit. When multiple
electrical components are installed in a rack, ensure that the total component power ratings do not exceed circuit
capabilities. Overloaded power sources and extension cords present fire and shock hazards.
To install the rack mounting bracket:
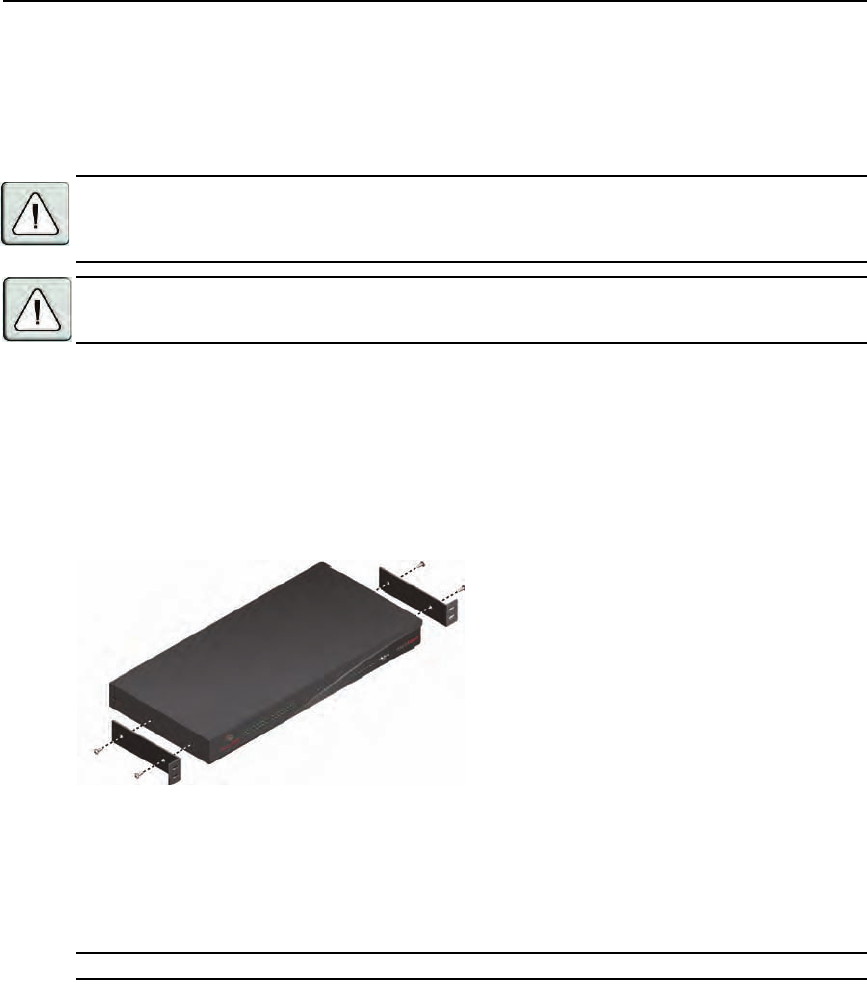
1. Remove the two rack mounting screws from each side of the AMX switch.
2. Place the rack mounting brackets next to the switch
as illustrated in Figure 2.5.
3. Insert the screws supplied with the rack mounting kit through the holes of the brackets and into
the AMX switch. T
ighten the screws securely.
Install the AMX switch into the rack using the approved method of the rack manufacturer.
Figure 2.5: AMX Switch Rack Mounting Diagram
Installing an AMX Switch
To install a new AMX switch, you will connect power sources, configure network settings and
connect the switch to the local area network (LAN).
NOTE: Turn off the AMX switch and disconnect the power cord from the AC outlet before servicing.
AMX.book Page 13 Thursday, June 12, 2008 4:14 PM


