23
USING YOUR SWITCH
22
USING YOUR SWITCH
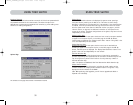
IntelliView Graphical On-Screen Display Menu Control
The IntelliView Graphical On-Screen Display (OSD) is intended to have a look and
feel similar to popular Windows-based operating systems for PCs. To activate the
On-Screen Display, press on “Scroll Lock + Scroll Lock + space bar” on your keyboard.
(There are other keys that can be substituted for the Scroll Lock key. For keyboards
that do not have Scroll Lock keys, refer to the “IntelliView Options Page” section of
this User Manual for more information).
IntelliView OSD Features
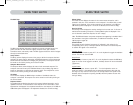
The Main page is the initial screen that will appear after opening the OSD. The
Graphical OSD screen layout is similar to many Windows-based operating systems.
The user will see a window with a title bar with some controls and a main area
where the user accesses the features of the Switch.
The top right side of the OSD title bar identifies the user’s current console (Consoles
A–D are BANKs 00–03, respectively) and the user that is currently logged-in.
Selecting the “?” button displays the Help Screen, which will provide instructions for
using the current OSD page.
Selecting the “X” button will close the page the user is viewing. Selecting the
Escape key on your keyboard will also close the OSD.
Note: All changes to the OSD are written and saved to memory as soon as the focus
changes; there is no method of cancelling or undoing actions once they have been
entered. There is one exception, when editing the contents of an edit box (e.g. the
Computer Name edit box), ESC will exit the control and revert the contents back to
their original form.
Input and Navigation Features
• Clicking on the Group, Computer Name, or ID column headers sorts the list box
entries in ascending order, by the column header selected.
• Double-clicking on a computer line will select that computer line and switch the
console’s focus to the selected port. If the user is restricted from accessing the
selected computer, an error message will be displayed. When the error dialog is
cleared, the console’s focus will remain on the previously selected port.
• Pressing the up or down arrow keys, while the OSD is up, moves the computer
cursor (the row highlighted blue) up or down. If the cursor moves outside of the
visible area, the list will scroll by one line. The scroll wheel on the mouse can
also be used to perform this function.
• The up/down double arrows, to the right of the computer list, scroll the list up
and down one page at a time. The Page Up and Page Down keys on the keyboard
also perform this function.
• Pressing the space bar will activate the OSD control in focus (same as clicking on
the control). If the list box is in focus, then pressing the space bar gives the
console control of the highlighted computer.
• Pressing “Enter” activates the control in focus, if the control is on a button, or
inside an edit box, but if the focus is on another type of control (e.g. the list
box), the Enter key activates the default control (Close or Exit, depending on the
current OSD screen).
• If the administrator presses “Ctrl + TAB” while viewing one of the Setup pages,
the OSD goes to the next page.
• Shortcut keys are enabled in the OSD. For example, pressing “ALT + X”, where X
corresponds to the underlined character in a control’s label, activates that control.
• When the OSD is up, keyboard and mouse input is routed to it; their signals are
not sent directly to the computer.
• Selecting the “Close” button (or pressing “ALT + C”) on any of the Setup pages
will return the user to the Main page.
• The TAB key can be used to cycle through the controls on the current OSD page.
Shift+TAB will cycle backwards.
• The OSD window can be repositioned by clicking on the title bar and dragging
the window with the mouse.
• To reposition the banner, press and hold “Ctrl + Alt” while the OSD is up; the
cursor jumps from the OSD window to the banner; clicking and dragging the
mouse will allow the user to reposition the banner.
• The Switch maintains the position settings of the OSD and banner for multiple
computer video resolutions. The user should set the positions of the OSD and
banner windows during the Switch setup to make the locations identical for all
video resolutions.
Note: The OSD does not turn off by itself. To reduce the risk of burning the OSD on the
monitor, turn off the monitor or set the KVM Switch to AutoScan Mode. All features
configured in the Setup pages are global (affect all consoles) unless otherwise noted.
P74290ea_F1DExxxC_man.qxd 30-10-2003 11:20 Page 22


