


78
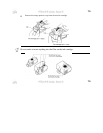
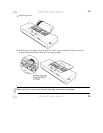
7.
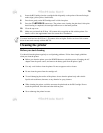
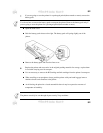
Insert the BJ Cartridge into the cartridge holder diagonally so the points of the small triangle
marks align (yellow-yellow, black-black).
8.
Press down gently on the BJ Cartridge until it clicks into place.
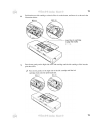
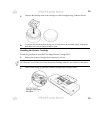
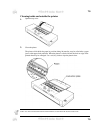
9.
Press the
CARTRIDGE
button once. The printer starts cleaning the print head. After print
head cleaning is completed, the cartridge holder moves to the home position.
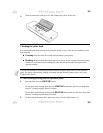
10.
Close the top cover.
11.
Make sure you install the IS Scan 1.20 scanner driver supplied on disk with the printer. For
details, refer to the supplemental sheet for scanner diver installation.
You must install and use the IS Scan 1 .20 scanner driver or higher. Earlier versions of this scanner
driver do not work correctly with the BJC-50.
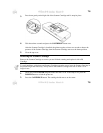
Cleaning the printer
Before you start cleaning
You should clean the printer regularly to avoid printing problems. Follow these simple guidelines
when you clean the printer:
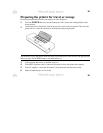
Before you clean the printer, press the POWER button to switch the power off, unplug the AC
adapter from the power source, and remove the battery pack from the printer. (p64)
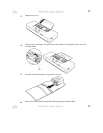
Use only a soft cloth to clean the printer. Do not use paper towels or tissues.
Do not clean the grease from the cartridge rail.
To avoid damaging the surface of the printer, do not clean the printer body with volatile
liquids such as thinners, benzene, or any chemical or spray cleaners.
When cleaning the printer, avoid the area near the print head on the BJ Cartridge. Do not
touch the print head, film cable and other delicate parts.
Never submerge the printer in water.
78