


1-7
Cisco 11000 Series Content Services Switch Hardware Installation Guide
78-15146-02
Chapter 1 Unpacking and Installing the CSS
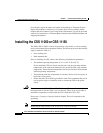
Installing the CSS 11050 or CSS 11150
Installing the CSS 11050 or CSS 11150 as a Free-Standing Unit
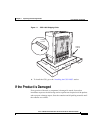
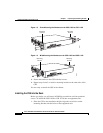
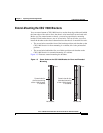
Position the CSS 11050 or CSS 11150 on the selected flat surface. When
installing the CSS, note that all cables connect to the front of the unit with the
exception of the cable that connects to the Ethernet management port on the rear
panel and the power cord.
Rack-Mounting the CSS 11050 or CSS 11150
Before you rack-mount the CSS 11050 or CSS 11150:
• Determine if you want to front-mount or mid-mount the CSS chassis into the
cabinet. The difference between front-mount or mid-mount is:
–
Front-mount sets the front edge of the unit even with the front edge of the
rack
–
Mid-mounting the CSS sets the front edge of the unit past the front edge
of the rack
• Install the mounting brackets on the CSS. The rack position of the CSS
determines where you will install the mounting brackets on the CSS chassis.
See the following section to install the mounting brackets.
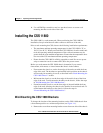
Installing the Mounting Brackets
Before you begin, you will need the mounting brackets and eight screws shipped
in the accessory kit accompanying the CSS 11050 and CSS 11150, and a #2
Phillips screwdriver.
To install the mounting brackets on the CSS chassis:
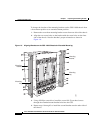
1. Position the CSS with its front panel facing you. On the left and right side of
its chassis, note the screw holes for installing the mounting brackets.
2. Position a bracket on one side of the chassis. Align the bracket with the
appropriate screw holes for front- or mid-mounting.
Figure 1-2 illustrates front-mounting the brackets. Figure 1-3 illustrates
mid-mounting the brackets.