


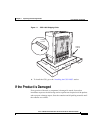

1-9
Cisco 11000 Series Content Services Switch Hardware Installation Guide
78-15146-02
Chapter 1 Unpacking and Installing the CSS
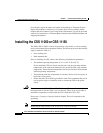
Installing the CSS 11800
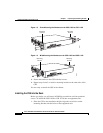
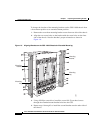
2. Use a #2 Phillips screwdriver and two pan-head screws to secure each
mounting bracket to each side of the rack.
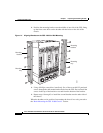
Installing the CSS 11800
The CSS 11800 is a rack-mount unit. When positioning the CSS 11800 for
installation, keep in mind that all cables connect to the front of the unit.
Prior to rack-mounting the CSS, observe the following installation requirements:
• The maximum ambient operating temperature for the CSS 11800 is 32° to
104° F (0 to 40° C). When you install the CSS 11800 in a closed or multi-unit
rack, the operating ambient temperature of the rack environment may be
greater than the room ambient temperature. Ensure that the temperature does
not exceed the CSS maximum ambient operating temperature.
• Ensure that the CSS 11800 is reliably grounded to earth. Do not use power
strips or extension cords to connect the CSS to the power source.
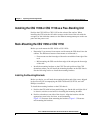
Before you rack-mount the CSS 11800 chassis, determine if you want to
front-mount, mid-mount, or extend-mount the chassis in the cabinet:
• Front-mount the chassis to set the front edge of the unit even with the front
edge of the rack. The brackets are preinstalled in this position on the chassis
and are ready for mounting in a rack, as described in the “Rack-Mounting the
CSS 11800 Chassis” section.
• Mid-mount the chassis to set the front edge of the unit in front of the front
edge of the rack. To mid-mount the brackets on the chassis, follow the steps
in “Mid-Mounting the CSS 11800 Brackets”.
• Extend-mount the chassis to set the front edge of the unit behind the front
edge of the rack; allowing the chassis to be installed in an enclosed rack. To
extend-mount the brackets on the chassis, follow the steps in
“Extend-Mounting the CSS 11800 Brackets”.
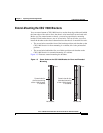
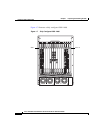
Mid-Mounting the CSS 11800 Brackets
To change the location of the mounting brackets on the CSS 11800 chassis from
a front-mount position to a mid-mount position (see Figure 1-4):
1. Remove the seven front mounting bracket screws from one side of the chassis.