


Chapter 2 Cabling the CSS
Connecting the Console to the CSS
2-32
Cisco 11000 Series Content Services Switch Hardware Installation Guide
78-15146-02
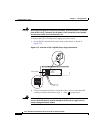
2. Using a flat-head screwdriver, loosen the captive screws on the three DC
connectors (labeled from left to right, +, –, and , respectively).
Warning
Before installing a wire, ensure that the polarity of the DC connections is
correct. Reversed polarity can cause damage to the DC power supply and can
create a dangerous shock hazard.
3. Install the wires into the appropriate connector. Make sure that the
uninsulated part of each wire is 9mm (0.35 in.) in length.
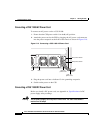
When installing the wires, always connect the ground wire first. When
disconnecting the wires, always disconnect the ground wire last.
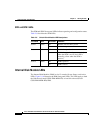
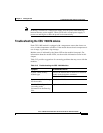
The proper power cable wiring between the CSS 11800 and DC power source
is illustrated in Table 2-11.
4. Tighten the captive screws to 5 to 7 inch-pounds (.6 to .8 Nm) of torque to
secure the wires in the connectors. Ensure the wires are held firmly in place.
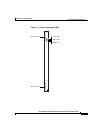
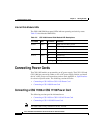
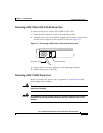
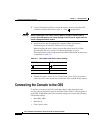
Connecting the Console to the CSS
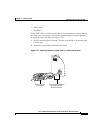
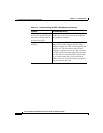
To connect a console to the CSS, attach the console cable (provided in the
accessory kit) to the Console port on the CSS 11050 or CSS 11150 front panel, or
to the CSS 11800 SCM panel. Your terminal settings must match the following
CSS default settings:
• Baud Rate: 9600
• Data Bits: 8
• Flow Control: none
59199
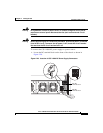
Table 2-11 CSS 11800 to DC Power Source Cabling
CSS 11800 DC Power Source
(Ground)
(Ground)
++
––
59199
59199