


2-2
Installing and Configuring Cisco Access Registrar, 4.2
OL-17221-02
Chapter 2 Installing Cisco Access Registrar 4.2
Installing Cisco Access Registrar 4.2 Software on Solaris
This section includes the following subsections:
• Deciding Where to Install
• Installing Cisco Access Registrar Software from CD-ROM
• Installing Downloaded Software
• Common Solaris Installation Steps
• Installing Cisco Access Registrar on LDoms
Tips Before you begin to install the software, check your workstation’s /etc/group file and make sure that
group staff exists. The software installation will fail if group staff does not exist before you begin.
Deciding Where to Install
Before you begin the software installation, you should decide where you want to install the new software.
The default installation directory for CAR 4.2 software is /opt/CSCOar. You can use the default
installation directory, or you can choose to install the Cisco AR software in a different directory.
Installing Cisco Access Registrar Software from CD-ROM
The following steps describe how to begin the software installation process when installing software
from the CAR 4.2 CD-ROM. If you are installing downloaded software, proceed to
Installing
Downloaded Software.
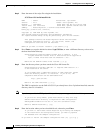
Step 1 Place the Cisco AR software CD-ROM in the Cisco AR workstation CD-ROM drive.
Step 2 Log in to the Cisco AR workstation as a root user, and enter one of the following command lines:
For Solaris 9:
pkgadd -d /cdrom/cdrom0/kit/solaris-2.9 CSCOar
For Solaris 10:
pkgadd -d /cdrom/cdrom0/kit/solaris-2.10 CSCOar
Step 3 Proceed to Common Solaris Installation Steps.
Installing Downloaded Software
This section describes how to uncompress and extract downloaded Cisco AR software and begin the
software installation.
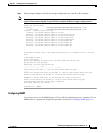
Step 1 Log in to the Cisco AR workstation as a root user.
Step 2 Change directory to the location where you have stored the uncompressed tarfile.
cd /tmp