


6-12
Cisco Provisioning Center User’s Guide
78-11339-01
Chapter 6 Configuring the Cisco NI-1 DLSAM Equipment Module
Naming Logical Ports
Deleting Logical Ports
Deleting an ATM logical port will delete an agent subscriber from the Cisco 6100/6130.
Step 1 From the Root Tree Viewer choose Network > Cisco NI1 DSLAM Network Name > Cisco NI1 DSLAM
Node > Node Name > Cisco NI1 DSLAM ATM Logical Port > Logical Port Name
Step 2 Click the Delete button on the toolbar.
Step 3 Apply the Transaction by clicking the Apply button on the toolbar.
Naming Logical Ports
The Cisco 6100/6130 NI-1 Equipment Module allows the name of a logical port to be changed from the
default name given by CPC when you save a logical port without naming it.
Equipment Module logical port names can be modified through the FTI or the GUI. The names can now
be set to any combination of characters, and must be less than 33 characters. When this name attribute
is modified, the Equipment Module verifies that the new name is unique within the containing node.
The name attribute is reset to its default when the user sets the name attribute to an empty string. The
Equipment Module logical port name is stored in the CPC database as the attribute srname.
A Transaction must be opened to change the name attribute.
Adding Inter-Network Links (Topology) Information
After uploading new fabric elements and Service elements, you need to add extra topology information
which the upload function is unable to determine (because the information is not known to the node).
Topology information or inter-network links are outside the scope of the a single node or subnet manager
and must be added manually through the CPC GUI or the FTI.
Links from subtended to subtending nodes in a subtending configuration must be added in the following
manner.
Adding Links Using the GUI
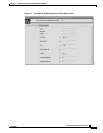
Step 1 From the Root Tree Viewer choose Network Admin > InterNetworking > Link.
Step 2 Click the Object Viewer button on the toolbar.
Step 3 Enter the attribute values under the Common Attributes, Contained By, LPort Association, and Link
Parameters tabs. For attribute information and detailed procedures, refer to Chapter 4, “General
Functions and Features.”
Step 4 Save and apply the link object by clicking the Save and Apply buttons on the toolbar.
Step 5 Repeat the above procedure to create each inter-networking link.