


Installing the Camera Software
Configuring the Basic Camera and Network Settings
Cisco PVC2300 and WVC2300 Internet Video Cameras with Audio Administration Guide 26
5
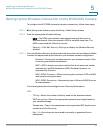
STEP 8 In the Network Settings window, select Static IP address from the drop-down list
if you want to assign the IP address. Otherwise, leave the default setting as Obtain
An IP Address Automatically (DHCP) and click Next.
STEP 9 The current settings of the camera are displayed. Make any changes needed for
your network and click Next.
STEP 10 From the Review Camera Settings window, click Next to confirm the settings or
click Back to make changes.
STEP 11 From the Confirm Settings window, click OK to continue or Cancel to close the
Confirm Settings window. When Cancel is clicked, you can click Back to make
changes.
When OK is clicked, the new settings are saved.
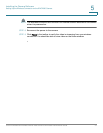
STEP 12 A dialog box appears indicating that the configuration has been saved
successfully. Click OK to continue.
STEP 13 Congratulations! Your camera is now configured. Click Finish to complete the
process.
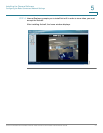
The PVC2300 or WVC2300 Internet Camera Home window launches.
STEP 14 When prompted, enter admin in both the User name and Password fields on the
login window. The default username and password is admin.