16
Chapter 1 Setup
6
1
3
4
3
-2
2
-1
4
-2
-1
5
1
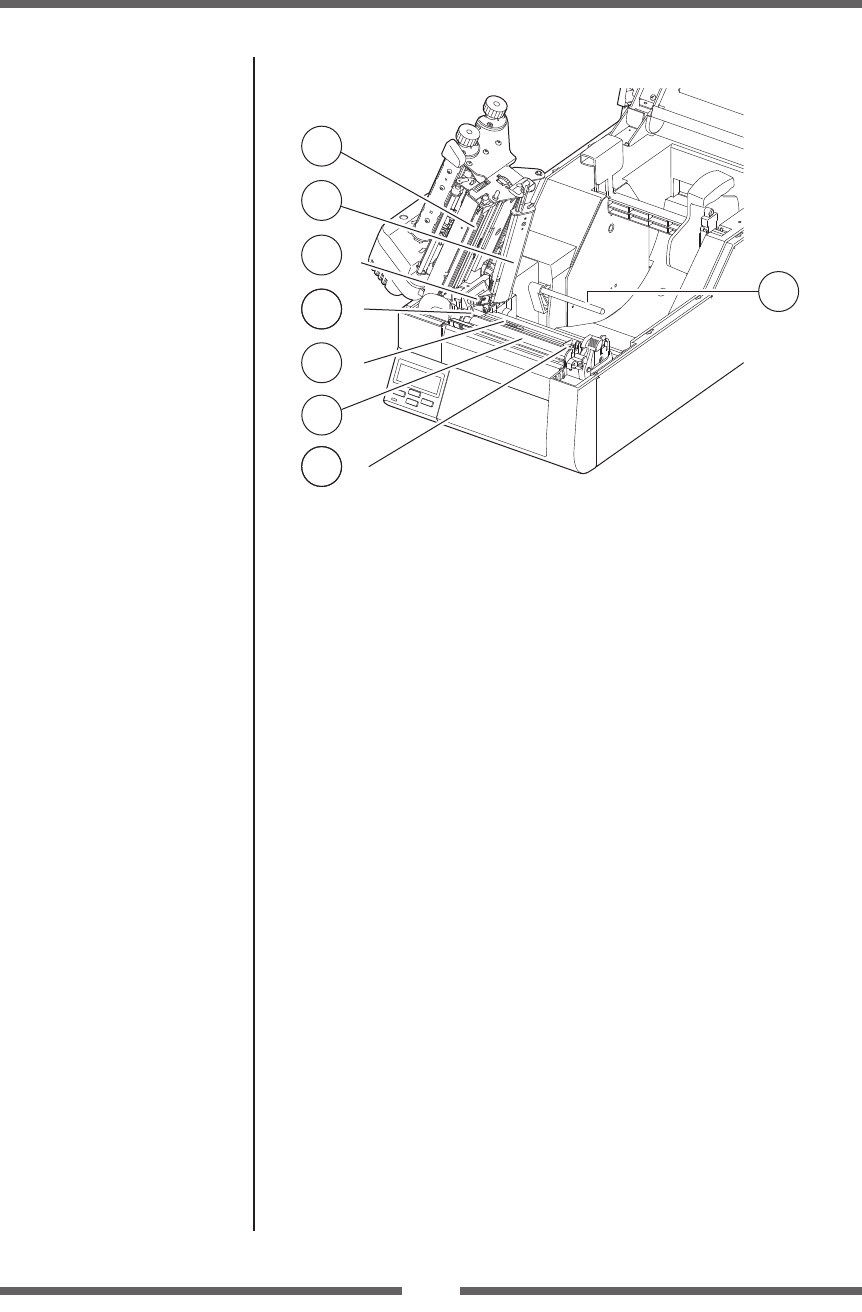
Thermal printhead
This is the printhead. Avoid touching this with your ngertips and
leaving grease or dirt on the printhead surface.
2
Sensor arm
The media can be installed by raising this arm.
The media can be held in place by lowering this arm.
3
Upper sensor (
3
-1) and bottom sensor (
3
-2)
When used as a transparent sensor (for labels and tags with notches),
it is used by matching the sensor markings of the upper sensor and
the bottom sensor. When used as a reective sensor, it is used by
matching the sensor marking on the bottom sensor with the position
of the black mark on the liner or media backing.
4
Media guides
Left xed media guide (
4
-1) and right movable media
guide(
4
-2)
The end of the media is matched to the left xed media guide, then
the right side movable media guide is moved horizontally to match
it to the media size. And the movable media guide is used as a guide
to match the upper sensor and bottom sensor when using the
transparent sensors.
5
Platen
Interlocked with the thermal printhead, it feeds media backwards or
forwards.
6
Media damper
When roll paper is used, this prevents marking on the media especially
at higher print speeds.
Setting the Media (p.25)
Setting sensor positions
(p.28)
Sensor Adjustments (p.55)
Part Names and Functions


