


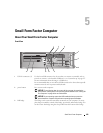

Desktop Computer 183
NOTICE: To avoid damage, ensure that the processor aligns properly with the socket, and do not use excessive force
when you install the processor.
5
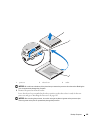
Set the processor lightly in the socket and ensure that the processor is positioned correctly.
6
While lightly pressing down on the processor, rotate the release lever back toward the system board until it
snaps into place, securing the processor.
7
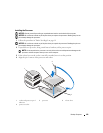
Clean the thermal grease from the bottom of the heat sink.
NOTICE: Ensure that you apply new thermal grease. New thermal grease is critical for ensuring adequate thermal
bonding, which is a requirement for optimal processor operation.
8
Apply the new thermal grease to the top of the processor.
9
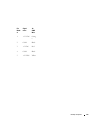
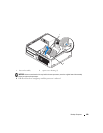
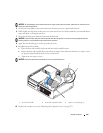
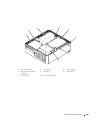
Install the heat sink assembly:
a
Place the heat sink assembly back onto the heat-sink assembly bracket.
b
Rotate the heat sink assembly down towards the computer base and ensure that the two captive screws
are properly aligned with the holes in the system board.
c
Tighten the two captive screws.
NOTICE: Ensure that the heat sink assembly is correctly seated and secure.
10
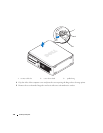
Replace the computer cover (see "Replacing the Computer Cover" on page 297).
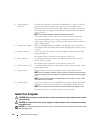
1 heat sink assembly 2 heat-sink assembly bracket 3 captive screw housing (2)
3
1
2