Installing and Configuring Hardware 41
Installaing and Configuring
Hardware
CAUTION: Only trained service technicians are authorized to remove the system
cover and access any of the components inside the system. Before performing any
procedure, refer to the safety and warranty information that shipped with your
system for complete information about safety precautions, working inside the
computer, and protecting against electrostatic discharge.
CAUTION: Electrostatic discharge can damage sensitive components. Always
use proper antistatic protection when handling components. Touching
components without using a proper ground can damage the equipment.
Installing the PERC 6/E and PERC 6/i Adapters
1
Unpack the PERC 6/E adapter and check for damage.
NOTE: Contact Dell Technical support if the controller is damaged.
2
Turn off the system and attached peripherals, and disconnect the system
from the electrical outlet. For more information on power supplies, refer to
your system’s
Hardware Owner’s Manual
.
3
Disconnect the system from the network and remove the system cover. For
more information on opening the system, refer to your system’s
Hardware
Owner’s Manual
.
4
Select an empty PCI Express (
PCI-E) slot. Remove the blank filler bracket
on the back of the system aligned with the PCI-E slot you have selected.
5
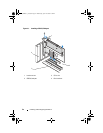
Align the PERC 6/E adapter to the PCI-E
slot you have selected.
CAUTION: Never apply pressure to the memory module while inserting the
controller into the PCI-E slot. Applying pressure could break the module
6
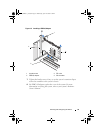
Insert the controller gently, but firmly, until the controller is firmly seated
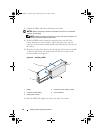
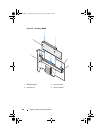
in the PCI-E slot. For more information on PERC 6 adapter,
see Figure 4-1. For more information on PERC 6/i adapter, see Figure 4-2.
NOTE: For a list of compatible controllers, see the documentation that
shipped with the system.
Dell_PERC6.1_UG.book Page 41 Wednesday, April 15, 2009 4:18 PM


