3 Double‑click Dell Extras > Dell Setup Assistant.
4 Follow the instructions on the computer screen.
Note: There is no need to remove the USB cable connecting the printer to the computer during wireless
configuration.
If the printer is currently set up for Ethernet
1 Unplug the Ethernet cable from the printer.
2 Place the printer close to the computer you want to use to configure the printer for wireless access.
Note: You will need to connect the printer to the computer with a USB cable. Make sure the printer is close
enough to the computer for your USB cable to reach both.
3 Close all open applications.
4 Insert the installation software CD.
If the installation dialog does not appear after a minute, then click the CD icon on the desktop.
5 Double‑click Dell Extras > Dell Setup Assistant.
6 Follow the instructions on the computer screen.
7 A second print queue will be created. Remove the Ethernet queue if you do not want to switch back to accessing
the printer over an Ethernet connection.
Using the printer locally (USB)
Select the connection type that describes how you currently access your printer:
If the printer is currently set up for Ethernet
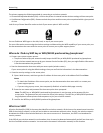
1 Firmly plug the square end of the USB cable into the back of the printer.
2 Firmly plug the rectangular end of the USB cable into the USB port of the computer.
3 Add the printer. See “Adding the printer” on page 102.
4 A second print queue will be created. Remove the Ethernet queue if you do not want to switch back to accessing
the printer over an Ethernet connection.
If the printer is currently set up for wireless
1 Attach a USB cable to the computer and to the printer.
2 Add the printer. See “Adding the printer” on page 102.
3 A second print queue will be created. Remove the wireless queue if you do not want to switch back to accessing
the printer over a wireless connection.
Using the printer over an Ethernet network
Select the connection type that describes how you currently access your printer:
If the printer is currently set up for wireless
1 Plug an Ethernet cable into the printer and to an available port on a switch or wall jack.
2 Wait a minute for the Ethernet network adapter to become active and acquire an IP address from the network.
Networking 101


