


Removing and Installing Parts 79
10
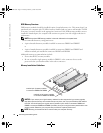
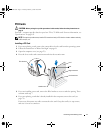
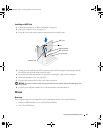
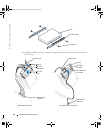
Press the retention arm into place, securing the card(s) in the computer.
NOTICE: Do not route card cables over or behind the cards. Cables routed over the cards can prevent
the computer cover from closing properly or cause damage to the equipment.
11
Connect any cables that should be attached to the card.
See the documentation for the card for information about the card’s cable connections.
12
Close the computer cover (see page 102).
NOTICE: To connect a network cable, first plug the cable into the network wall jack and then plug it into
the computer.
13
Connect your computer and devices to electrical outlets, and then turn them on.
14
Install any drivers required for the card as described in the card documentation.
Removing a PCI Card
1
Follow the instructions in "Before You Begin" on page 68.
2
Open the computer cover (see page 70).
3
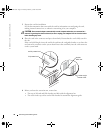
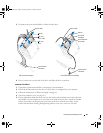
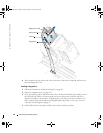
Press the lever on the card retention arm and raise the retention arm.
4
If necessary, disconnect any cables connected to the card.
5
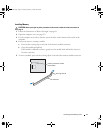
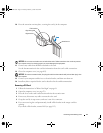
Grasp the card by its top corners, and ease it out of its connector.
6
If you are removing the card permanently, install a filler bracket in the empty card-slot
opening.
If you need a filler bracket, contact Dell (see page 112).
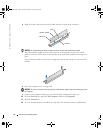
filler bracket
alignment bar
alignment guide
retention arm
T2310bk2.book Page 79 Thursday, February 5, 2004 10:00 AM