12
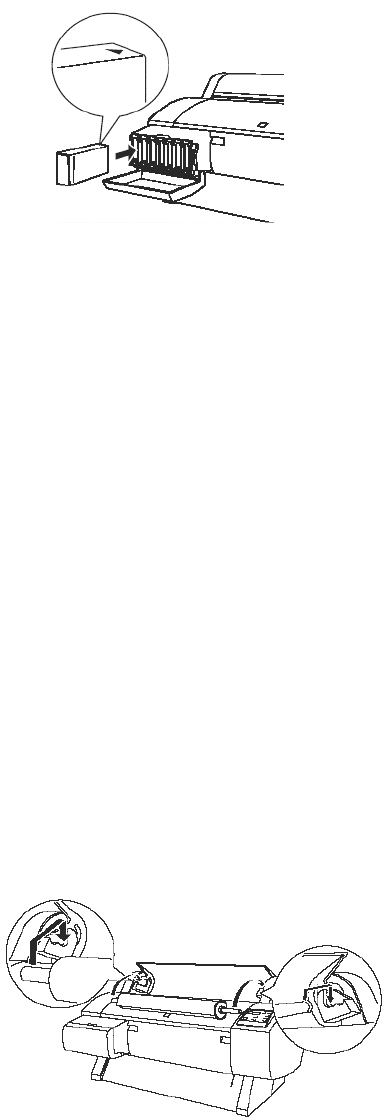
6. Install the ink cartridges in the printer. Hold each cartridge with the arrow mark
pointing toward the printer. Insert it until the corresponding Ink Out light turns off on
the control panel. Photographic Dye ink users: insert the black ink cartridges in the
first two slots on the left. UltraChrome ink users: if you're installing the included
cartridges, insert the Photo Black cartridge in the first slot on the left, then insert the
Light Black cartridge in the second slot.
7. After installing all the cartridges, lower the ink lever to the locked position and close
the ink compartment cover.
Never turn off the printer or change the position of the ink lever while the Pause light is
flashing.
The printer begins charging the ink delivery system and the Pause light flashes. This takes
about 10 minutes. Do not turn off the printer or interrupt this process, or you'll use more ink
than necessary. When the Pause light stops flashing and Paper Out appears on the control
panel, you're ready to load the roll paper.
Loading Roll Paper
Before you begin, locate the roll paper that came with your printer and remove it from its
protective packaging. The paper may already be loaded on the spindle. (If it isn't, see
"Loading the Paper onto the Spindle" in the EPSON 7600/9600 User Manual).
Follow these steps to place the paper in the printer:
1. Open the roll paper cover.
2. To avoid feeding excess paper, make sure you don't select Sheet when you're using
roll paper. Place the roll paper in the printer as shown. (The white end of the spindle
goes on the right.)
All Trademarks used in this document are the properties of their respective owners. Rev. 1.3 4/6/2004


