21
Chapter 4: Flushing and Charging
Now it is time to charge the JetPlate with Plate Marker.
Draining The JetPlate
1. Turn off your JetPlate 7600.
2. Raise the ink locking lever.
3. Remove ALL the ink cartridges.
4. Insert draining cartridges into all seven channels. Each cartridge is keyed to a specific ink
channel. Lower the ink locking lever.
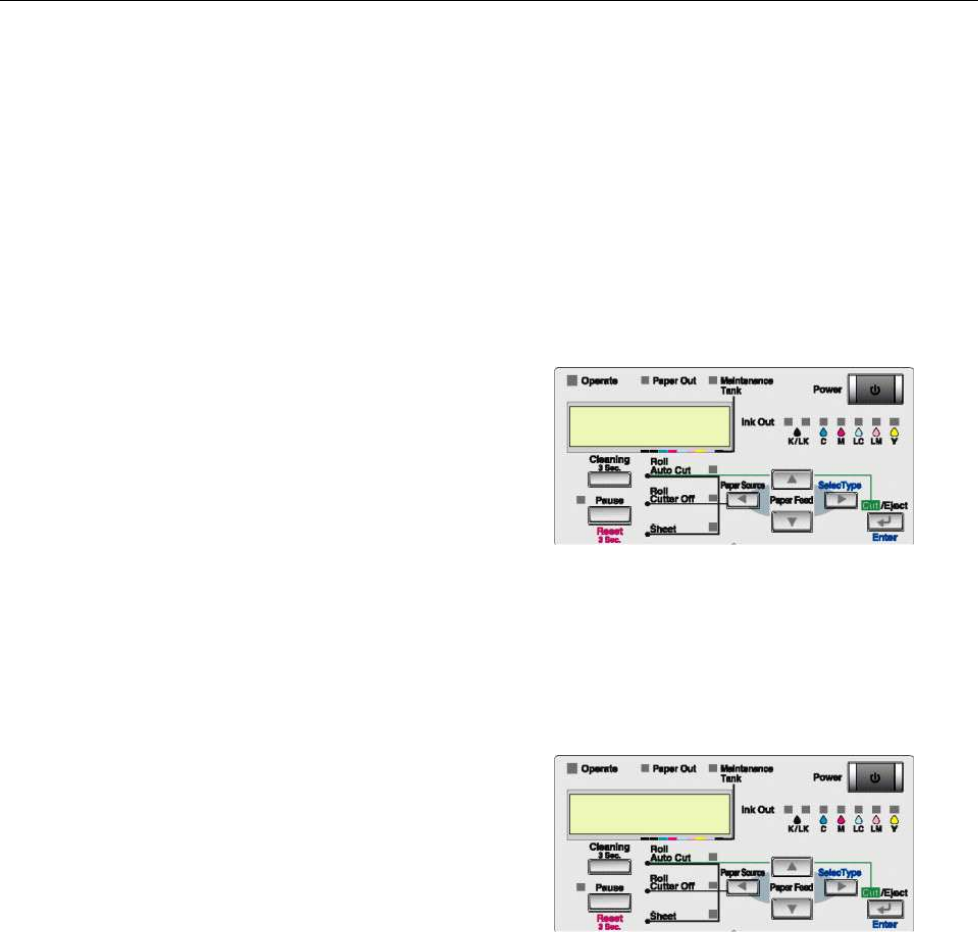
Enter Override mode
1. Enter the service mode by pressing Paper
Source + Paper Feed Down + Cut/Eject on
the control panel, while turning on the
printer.
2. Press Paper Feed Down x2 to Service
Config, then hit Select Type.
3. Press Paper Feed Down x5 to ED Mode,
then hit Select Type.
4. Press Paper Feed Down until O is present.
5. Hit Enter, Confirm that an Asterisk is next to O.
• Perform and Initial Fill, described below. The initial fill will take approximately 10 minutes.
1. Enter the service mode by pressing Paper
Feed Up + Paper Feed Down + Enter on
the control panel, while turning on the
printer.
2. Press Paper Feed Down x2 to Cleaning,
then hit Select Type.
3. Press Paper Feed Down x3 to Init Fill, then
hit Enter.
4. The printer will begin to drain the system of ink. This procedure will take about 10
minutes.
• Flushing The JetPlate
• Now it is time to flush the ink out of the JetPlate to get the system ready for Plate
Marker (see chart below for proper sequence).
1. Turn off your JetPlate 7600.
2. Raise the ink locking lever.
3. Remove all the ink cartridges.
4. Insert maintenance cartridges into all seven channels. Each cartridge is keyed to a
specific ink channel. Lower the ink locking lever.
All Trademarks used in this document are the properties of their respective owners. Rev. 1.3 4/6/2004


