


19
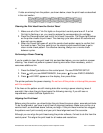
patterns to make your adjustments, instead of the ones printed toward the left or
right.
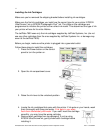
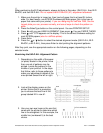
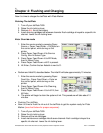
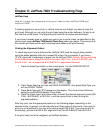
2. Look at the display screen on the printer. It shows #1 K1. Do not change the
adjustment value for K1. Press Enter and continue with the following steps.
3. The printer is now prompting you to choose the best block in the group labeled K2 in
row #1.
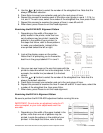
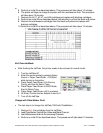
4. Use your own eye loupe or the one that came with the printer to determine which
block has the least visible vertical line. In this example, the middle block (numbered
5) is the best choice.
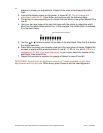
5. Use the
or button to select the number of the best block. Note that 5 is always
the default selection.
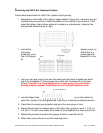
6. Press Enter to accept your selection and go to the next group of blocks. Repeat this
process to examine the remaining blocks in row #1: C, M, Lc, Lm, and Y (if this is a
realignment, K1 and Y are most important). In each case, select the number of the
best block, then press Enter.
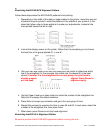
7. Repeat this process to examine the groups of blocks in rows #2 and #3.
IMPORTANT: Do not enter an adjustment value for K1 when prompted, or your color
adjustments won't be accurate. When done, press Pause to exit the head alignment.
All Trademarks used in this document are the properties of their respective owners. Rev. 1.3 4/6/2004