


57
Transporting the Printer
If you move your printer some distance, you need to prepare it for transportation in
its original box or one of a similar size. Follow these steps:
To avoid damage, always leave the ink cartridges installed when
transporting the printer.
Be sure to remove the tape used in step 4 after installing the printer
in its new location.
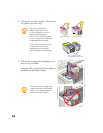
1. Turn on the printer, wait until the print head locks in the far right position, then
turn off the printer.
2. Unplug the power cord from the electrical outlet. Then disconnect the printer
cable from the printer.
3. Remove any paper from the printer and remove the paper support.
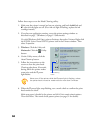
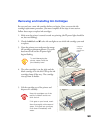
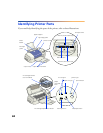
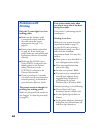
4. Open the printer cover. Secure the ink cartridge
holder to the printer with tape as shown, then
close the printer cover.
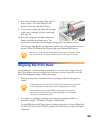
5. Push in the output tray extensions and close
the tray.
6. Repack the printer and attachments in the
original box using the protective materials
that came with it. See the unpacking sheet
that was packed with your printer.
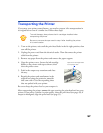
Be sure to keep the printer level as you transport it.
After transporting the printer, remove the tape securing the print head and test your
printer. If you notice a decline in print quality, clean the print head (see page 49); if
output is misaligned, align the print head (see page 55).
Tape the ink cartridge holder
to the printer case