


Appendix E
Defaults and DIP Switches
This appendix lists all of the default settings and lists and explains the
settings of all the DIP switches.
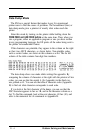
Default and Initialization Settings
The EX can be initialized (returned to a fixed set of conditions) in
three different ways: when it is turned on, when it receives an INIT
signal at the parallel interface (pin 31 becomes LOW), and when it
receives the ESC @ command.
The following conditions are always reset:
l
The print head returns to the home position.
l
If the color option kit is installed, the ribbon carriage is reset to print
in black.
l
Interface signals are reset, and the printer is put on line.
l
The current print line is cleared.
l
Margins and vertical tab settings are cleared, line spacing is set to
1/6-inch, horizontal tabs are set at every eighth position and vertical
tab channel 0 is selected.
l
The page length and skip-over-perforation are set according to DIP
switches 2-1 and 2-3, and the top of form position is set to the current
line.
l
The ROM characters are selected, and the Epson mode character
table and international character set are reset according to DIP
switches 1-3 and 1-6 to 1-8.
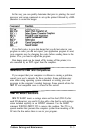
In addition, when the printer is initialized by turning on the power or
by an INIT signal, the data buffer is cleared of all text.
ESC @ resets the typestyle to the current SelecType settings, but the
other two methods reset the typestyle according to the DIP switches.
Also, ESC @ does not check whether any DIP switches have been
altered since the printer was turned on; instead it uses the old settings.
Defaults and DIP Switches
E-1