40
Note:
Your tear-off position setting remains in effect until you change it, even
if you turn off the printer.
1. Make sure the Tear Off (Font) lights are flashing (the paper is
at the current tear-off position). You may need to press the
Tear Off (Font) button to advance the paper to the tear-off
position.
2. Open the paper guide cover.
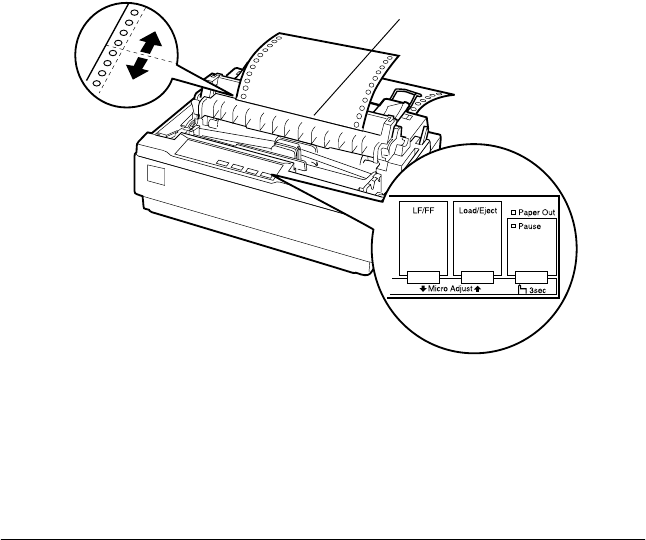
3. Hold down the Pause button for about three seconds. The
Pause light begins to flash and the printer enters the Micro
Adjust mode.
4. Press the LF/FF D
button to feed the paper backwards, or press
the Load/Eject U button to feed the paper forwards, until the
paper perforation is aligned with the tear-off edge.
Note:
The printer has a minimum and a maximum tear-off position. If you
try to adjust the tear-off position beyond these limits, the printer
beeps and stops moving the paper.
tear-off edge


