14 Copying on CD/DVD
6. Press the x Color button to copy in color, or the
x B&W button to copy in grayscale.
Note:
❏ If you need to stop copying, press the y Stop
button.
❏ We recommend that you print a test of the layout
on a test CD/DVD, before printing on a real
CD/DVD.
❏ If necessary, you can adjust the print position.
See “Adjusting the Print Position” on page 14
for details.
❏ If an error message appears on the LCD panel,
follow the instructions on the LCD panel to clear
the error.
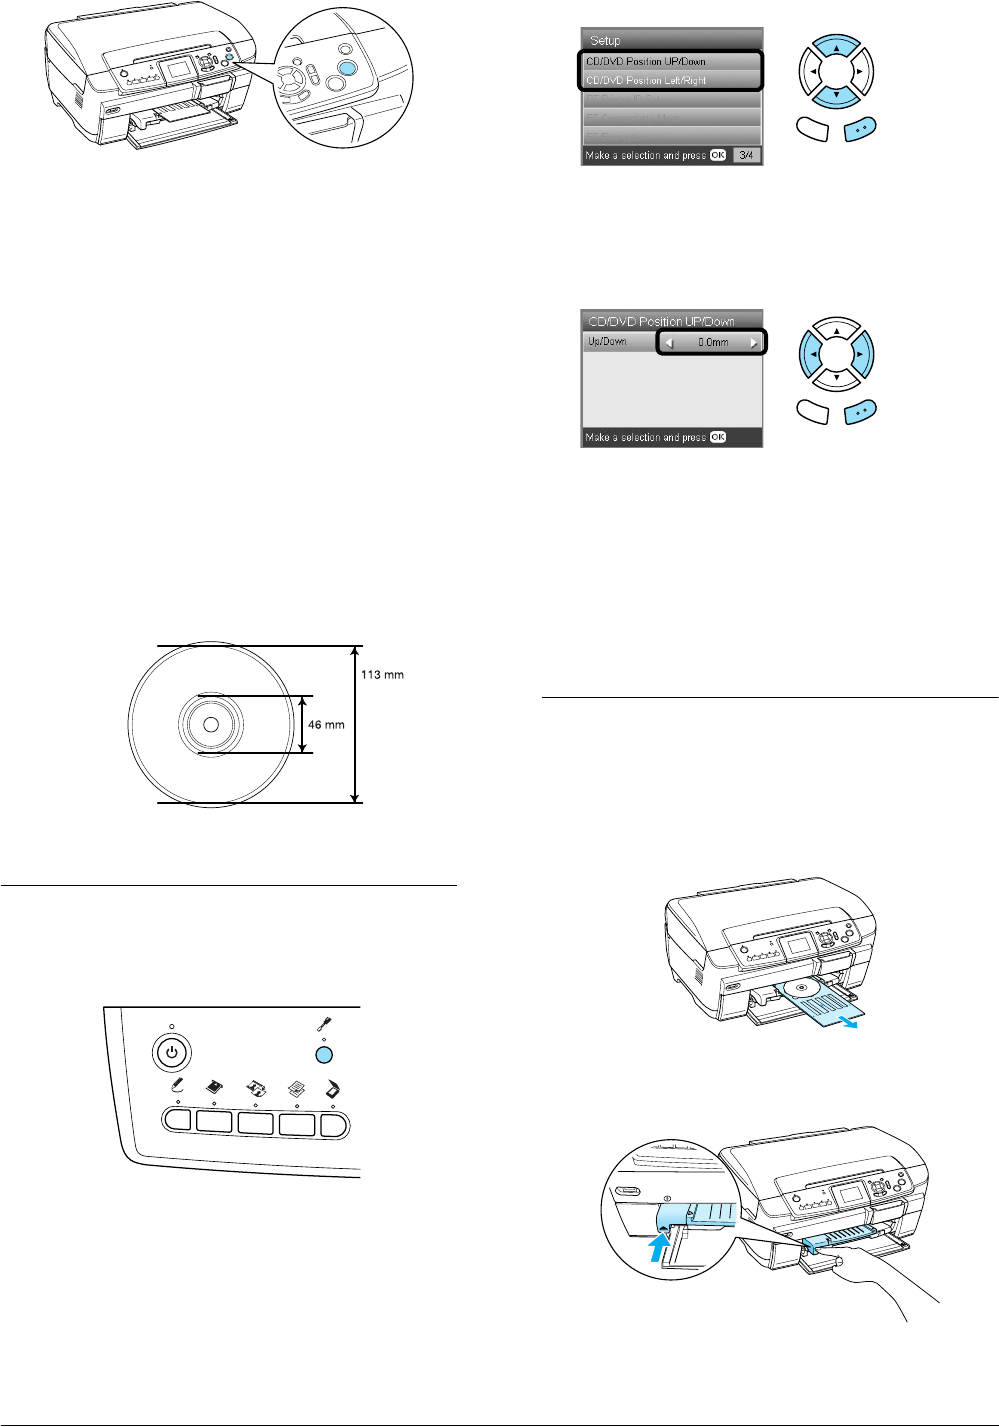
❏ The printable area of a CD/DVD is illustrated as
follows.
Adjusting the Print Position
1. Press the Setup button.
2. To move the image up or down, select CD/DVD
Position Up/Down. To move the image left or
right, select CD/DVD Position Left/Right.
3. Select the amount to move the image. Select the
minus quantity when moving the image down
or left, and the plus quantity when moving up
or right.
Note:
❏ You can select from –5.0mm to 5.0mm.
❏ This product remembers the print adjustment
settings even after it has been turned off, so you
do not need to adjust the position each time you
use the CD/DVD function.
Ejecting the CD/DVD Tray
1. Make sure that copying is finished.
2. Eject the CD/DVD tray by pulling it out straight
from the CD/DVD guide.
3. Press 5 on the CD/DVD guide. The CD/DVD
guide retracts.
12-cm CD/DVD
Back OK
Back OK


