Maintenance and Transporting 41
English
Maintenance and
Transporting
Checking the Print Head
Nozzles
If you find that the printed image is unexpectedly
faint or some dots in the printed image are missing,
checking the print head nozzles helps you to identify
the problem.
Note:
Make sure the CD/DVD tray is not inserted in this
product and the CD/DVD guide is closed before using the
Nozzle check utility.
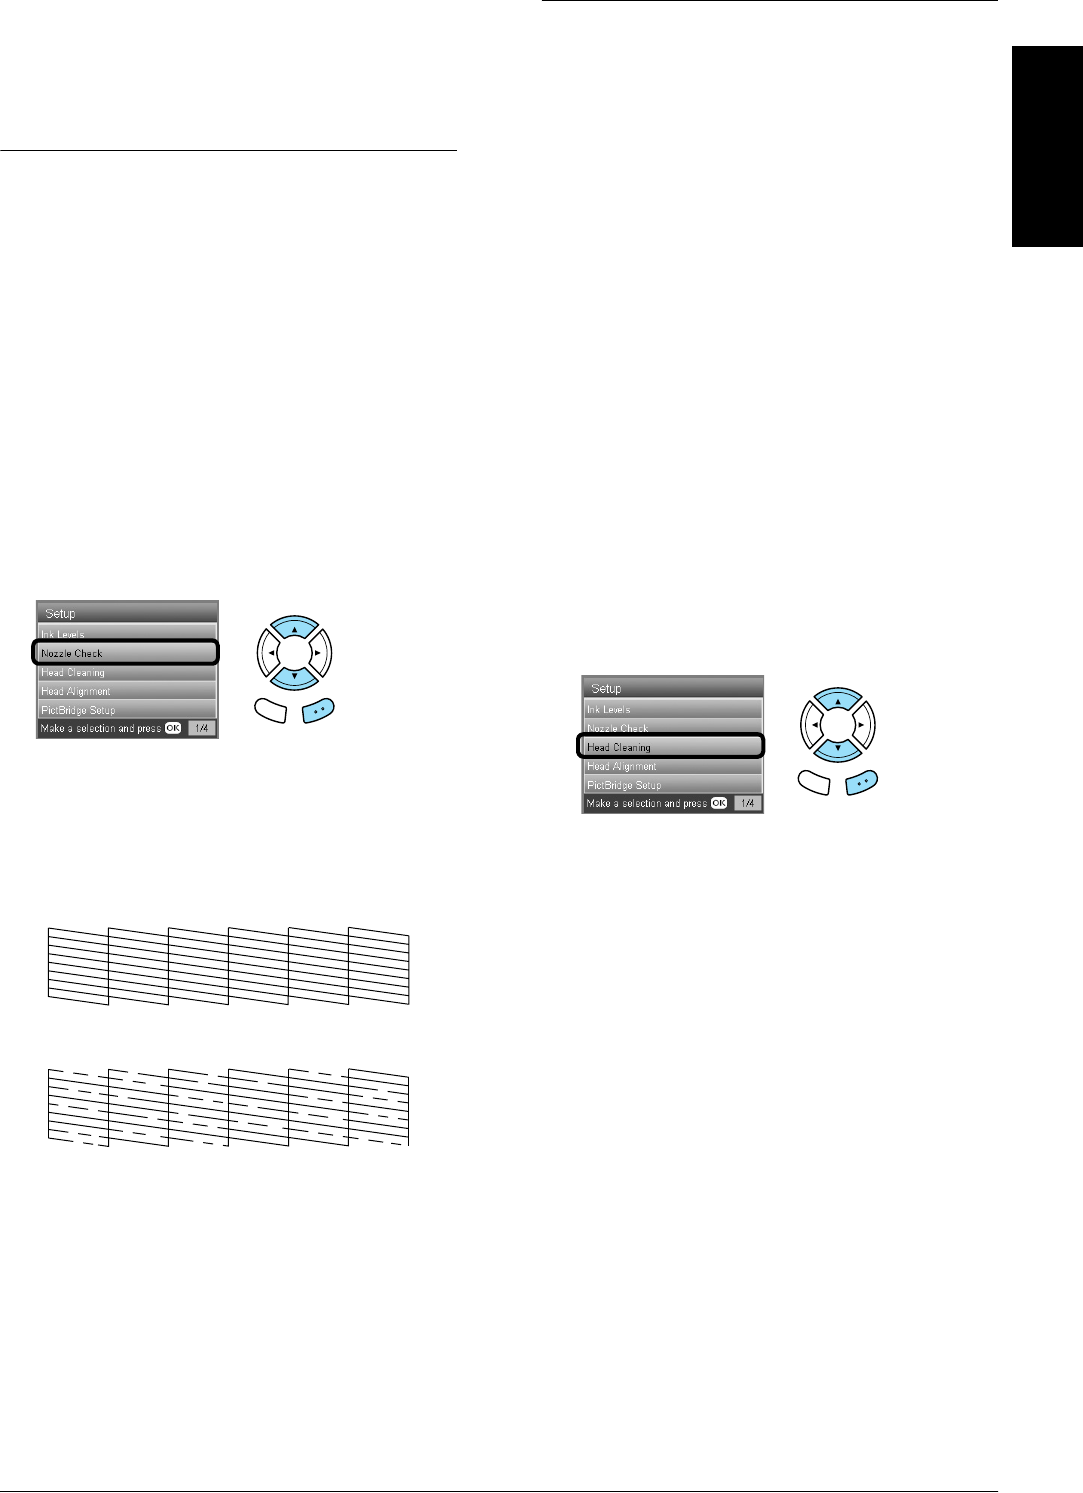
1. Make sure that A4 paper is loaded in the front
tray and press the Setup button.
2. Select Nozzle Check.
3. Confirm the messages on the LCD panel, then
press the OK button to start the nozzle check.
4. Check the printout.
Good: print head does not need to be cleaned
yet.
Not Good: print head needs to be cleaned.
The actual printouts are printed in color (CMYK).
If the nozzle check result is not good, there may be a
clogged ink nozzle or a misaligned print head. To
solve these problems, press the OK button and
follow step 3 and 4 in “Cleaning the Print Head” of
the next section.
If the nozzle check result is good, press the Back
button to return to the Setup menu.
Cleaning the Print Head
If you find that the nozzle check result is
unexpectedly faint or some dots in the printed image
are missing, you may be able to solve these problems
by cleaning the print head, which ensures that the
nozzles are delivering ink properly.
Note:
❏ Print head cleaning uses both color and black ink. To
avoid wasting ink, clean the print head only if the copy
or print quality drops (for example, blurred printout,
incorrect or missing color).
❏ Before cleaning the print head, perform the nozzle
check first to see if it really needs to be cleaned. This
saves ink.
❏ When a message appears on the LCD panel to prompt
you to replace the ink cartridge or to indicate the ink
is low, you cannot clean the print head. In this case,
replace the appropriate ink cartridge first.
❏ Make sure the CD/DVD tray is not inserted in this
product before using the Head Cleaning utility.
1. Press the Setup button.
2. Select Head Cleaning.
3. Confirm the messages on the LCD panel, then
press the OK button to start head cleaning.
4. When Print head cleaning in progress.
disappears from the LCD panel, press the OK
button to perform the nozzle check to confirm
that the head is clean and to reset the cleaning
cycle. See “Checking the Print Head Nozzles” of
the previous section.
c
Caution:
Never turn off this product while Head
cleaning is in progress. Doing so may damage
this product.
Back OK
Back OK


