34 Printing from Film
Selecting the Film Type
Changing Print Settings
Print detail settings
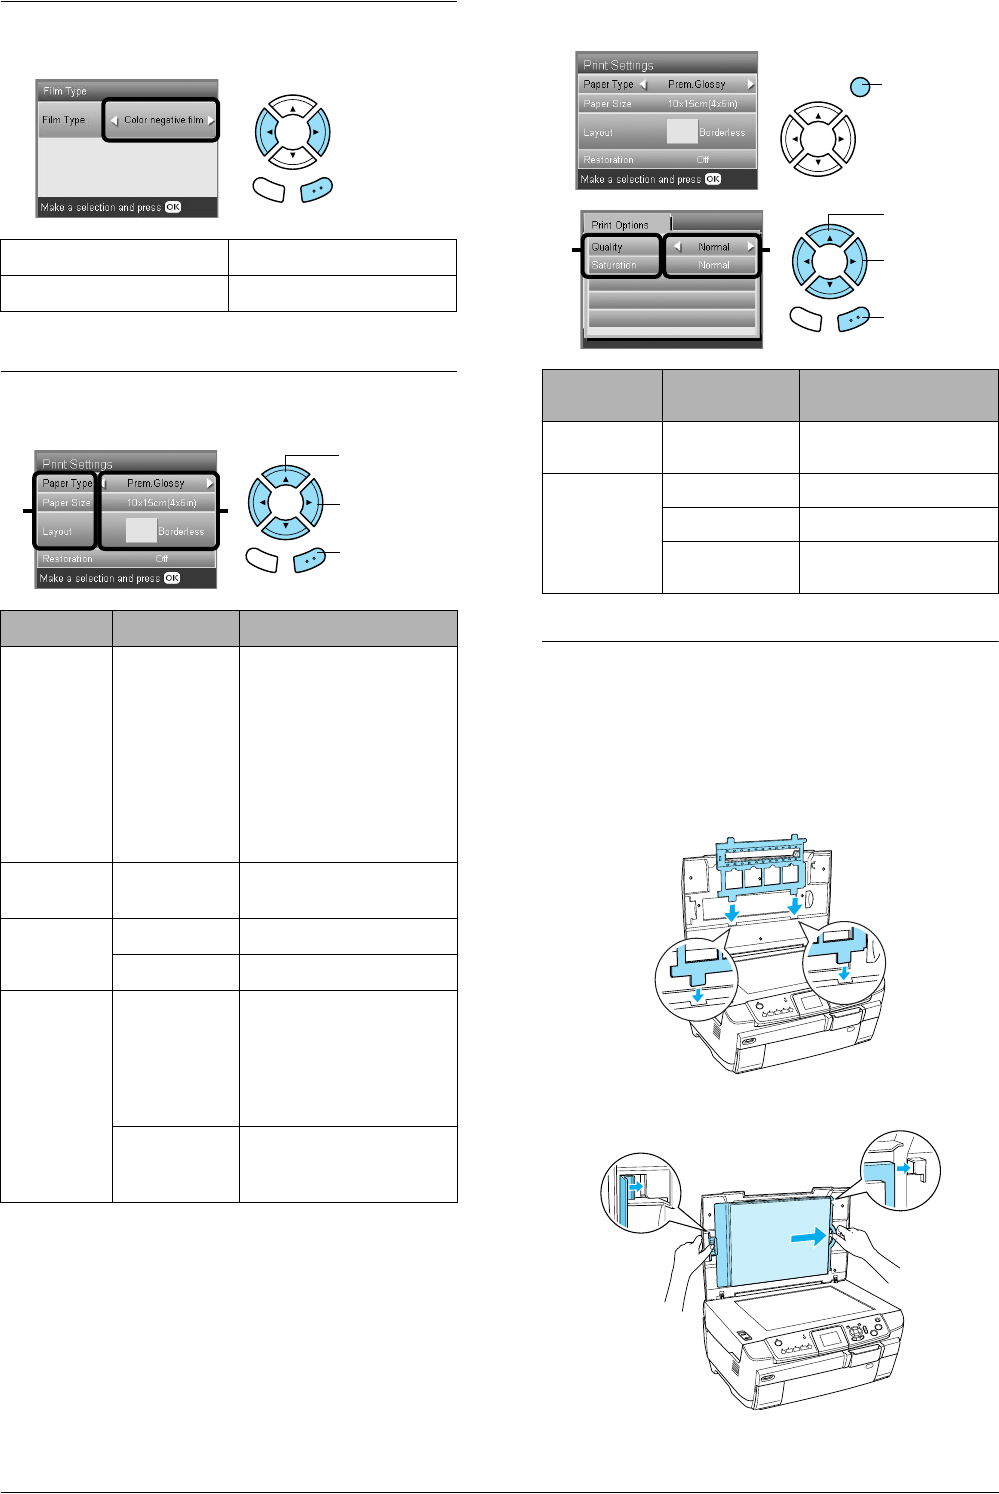
Storing the Film Holder
When not using the film holder, you can store it
inside the document cover.
1. Open the document cover.
2. Slide the film holder into the document cover.
3. Insert the reflective document mat.
4. Close the document cover.
Color negative film Positive color film (strip)
Color slide B&W negative
Menu Item Setting Item Description
Paper Type Plain (Front),
Plain (Back),
Bright White
(Front), Bright
White (Back),
Photo Paper,
Prem.Glossy,
GlossyPhoto,
SemiGloss,
Matte
Prints in the paper type
you select.
See page 4 for detailed
settings.
Paper Size A4, 10 × 15
cm (4 × 6 in)
Prints in the paper size you
select.
Layout Borderless Prints without margin.
with Border Prints with margin.
Restoration ON Restores faded colors on
film and in photos.
Note:
This setting has no effect
when B&W negative is
selected as the Film Type.
OFF Leaves faded colors on
film and in photos as they
are.
Back OK
Back OK
1. Select the
Menu Item.
2. Select the
Setting Item.
3. Press the
OK button.
12
Print Options
Item
Setting Item Description
Quality Normal, Photo,
Best Photo
Prints in the quality
setting you select.
Saturation Less Saturation Makes printouts duller.
Normal Makes no adjustment.
More
Saturation
Makes printouts more
vivid.
1. Press the
Options button.
3. Select the
setting Item.
4. Press the
OK button.
3
Back OK
2
2. Select the
Menu Item.
