


58 Section 8: Mechanical Adjustments
4250/4225 Card Printer UserÕs Manual
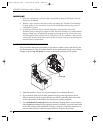
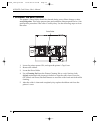
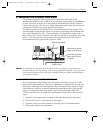
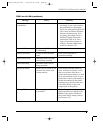
3. Once this screw has been loosened, press the Card Input Tray down and slide
the left Card Input Guide to the left. Then, insert the stack of cards all the way
into the Card Hopper.
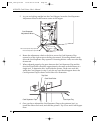
4. Release both the Card Input Tray and the left Card Input Guide. Both are
spring loaded and will automatically adjust to the size of your cards.
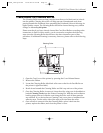
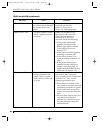
5. Tighten the Card Guide Adjustment Screw. Note that you may need to hold the
left Card Input Guide slightly away from the card stack while tightening the
screw if the stack seems to fit too snugly between the guides. Adjustment to the
left Card Input Guide is now complete.
Card Guide
Adjustment
Screw
Left Card
Input Guide
Card Input
Tray
510291_card printer 11/24/98 12:18 PM Page 58