SmartCard Offset
-< 00 >+
This option applies only if the printer has a built-in smart card contact station. If so,
this option allows you align the position of the smart card so that its smart chip
makes positive contact with the smart card contact station as the card passes
through the printer. When adjusting this value, keep in mind that a card and its
smart chip will always remain in the same relative position during printing. The
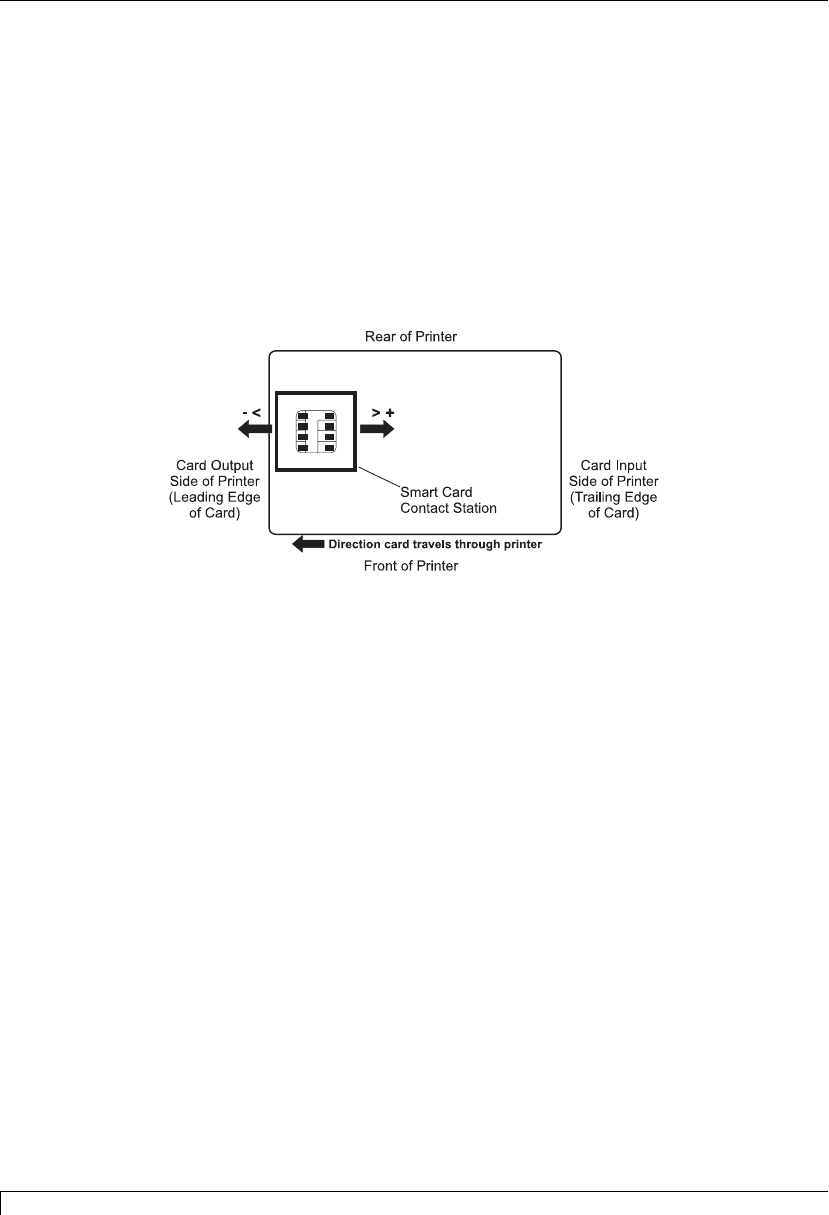
following diagram represents how the smart card contact station will be positioned
in relation to a cardÕs smart chip as a positive or negative SmartCard Offset value is
entered.
To move the position of the smart card contact station more toward the leading
edge of the card, or card output side of the printer, press the On/Cancel button to
enter a negative value. To move the position of the smart card contact station more
toward the trailing edge of the card, or card input side of the printer, press the
Pause/Resume button to enter a positive value. Notice the arrows on these buttons
indicate the direction the smart card contact station will move in relation to a cardÕs
smart chip. The maximum adjustment range is ± 32 pixels. As a rule, 10 pixels
equals about .030Ó/.8mm.
Print Length
-< 00 >+
This option allows you to reduce or lengthen the overall printable area in order to
optimize edge-to-edge printing toward the trailing edge of a card. When adjusting
this value, keep in mind that cards always remain in the same position as they
travel through the printer. The following diagram represents how the print length
will move in relation to the fixed card position as a positive or negative Print
Length value is entered.
86 Appendix C: Internal Printer Settings
4250/4225 Card Printer UserÕs Manual
510291_card printer 11/24/98 12:19 PM Page 86
