


RESTRICTED USE ONLY Fargo Electronics, Inc.
CardJet 410 Card Printer/Encoder and Persona CardJet C7 Printer User Guide (Rev. 6.1)
4
Troubleshooting with the Printer connections __________________________________________ 3-21
Troubleshooting the Card Jam ______________________________________________________ 3-22
Troubleshooting with the Host Driver Download Software ________________________________ 3-22
Troubleshooting with an open Printer Top Cover _______________________________________ 3-22
Resolving the CardJet Card Printer problems _____________________________________________ 3-23
Resolving the Printer Startup problems _______________________________________________ 3-23
Resolving the Bar Code problems ___________________________________________________ 3-24
Resolving the Off-center Card Printing problems _______________________________________ 3-24
Resolving the pixelated or grainy ID Card Photo problems ________________________________ 3-25
Section 4: Printer Adjustments_______________________________________________4-1
Table of Contents ___________________________________________________________________ 4-1
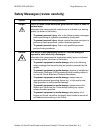
Safety Messages (review carefully)______________________________________________________ 4-3
Additional Safety Precautions for CardJet Technicians (review carefully) _____________________ 4-4
Installing the Windows Printer Driver____________________________________________________ 4-5
Installing the Printer Driver from the Software Installation CD______________________________ 4-5
Resolving the unopened CD Installer Program problem __________________________________ 4-31
Installing the Printer Driver Updates _________________________________________________ 4-32
Downloading the Printer Driver Files_________________________________________________ 4-33
Setting up the Printer Driver __________________________________________________________ 4-34
Windows 98 / Windows Millennium _________________________________________________ 4-34
Windows 2000 / Windows XP ______________________________________________________ 4-34
Printer Driver Options_______________________________________________________________ 4-35
Selecting the Card tab window ________________________________________________________ 4-36
Selecting the Print Quality (Best, Normal or Fast print modes) _____________________________ 4-37
Using the default Card Size ________________________________________________________ 4-39
Selecting the Orientation (Portrait or Landscape) _______________________________________ 4-40
Selecting the Rotate Front by 180 Degrees option _______________________________________ 4-41
Specifying the Copies_____________________________________________________________ 4-41
Clicking on the About button _______________________________________________________ 4-42
Selecting the Image Color tab _________________________________________________________ 4-43
Selecting the Color Quality under the Image Color tab ___________________________________ 4-44
Selecting the Color Quality ________________________________________________________ 4-45
Selecting the Print in Grayscale checkbox _____________________________________________ 4-46
Selecting the Print in Grayscale checkbox _____________________________________________ 4-46
Selecting the Infrared Bar Codes checkbox ____________________________________________ 4-46
Selecting the Default button _______________________________________________________ 4-47
Selecting the Image Position tab _______________________________________________________ 4-48
Using the Vertical and Horizontal Adjustment arrows____________________________________ 4-49
Selecting the Magnetic Encoding tab (both 410/C7 models) _________________________________ 4-51
Using the Verification option under Magnetic Encoding __________________________________ 4-52
Using the Magnetic Track Selection option under Magnetic Encoding _______________________ 4-53
Using the Magnetic Track Options under Magnetic Encoding______________________________ 4-54
Using the Bit Density radio buttons under Magnetic Encoding _____________________________ 4-55
Using the Character Size radio buttons under Magnetic Encoding __________________________ 4-55
Using the ASCII Offset under Magnetic Encoding ______________________________________ 4-56
Using the LRC Generation radio buttons under Magnetic Encoding _________________________ 4-57
Using the Character Parity radio buttons under Magnetic Encoding _________________________ 4-57
Reviewing the Shift Data Left under Magnetic Encoding _________________________________ 4-58
Using the Default button under Magnetic Encoding _____________________________________ 4-59
Reviewing the ISO Track Locations__________________________________________________ 4-60
Reviewing the Sample String _______________________________________________________ 4-61
Reviewing the ASCII Code and Character Table________________________________________ 4-62
Sending the Track Information______________________________________________________ 4-63
Selecting the Print Supplies tab________________________________________________________ 4-64
Using the Reorder Numbers indicators________________________________________________ 4-66