1-28
GCC Elite Color 16 Series User’s Guide
Installing Printer Drivers and Locating User Documentation
Adjusting the Color Ink Alignment Settings
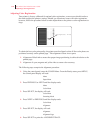
Next go to the color registration adjustment portion of the alignment page. You will notice that
there are six alignment patterns printed on the paper; three horizontal and three vertical. In
each set of patterns, there is one each for YELLOW, MAGENTA and CYAN inks. Pay closest
attention to the series of narrow tick marks in the alignment patterns. You will see two short
black lines that are separated by a short colored line. You should be able to see that in each test
pattern, there should be only one instance where the two black lines and the colored line are in
perfect alignment with each other, thus forming a single straight line.
When the straightest line is identified, note the number next to the line. In the appropriate
adjustment menu, set the value to the number representing the straightest line. Do this for each
color, and then print the alignment page again. When all of the straightest lines are at the “0”
position, alignment has been successfully completed.
NOTE:
It should only be necessary to perform this procedure one time when the printer is installed.
Installing Printer Drivers and Locating User Documentation
Installing Printer Drivers and other Software for Windows
To install printer drivers and other software for Windows (Windows 95 and later), insert the
Elite Color 16 Series CD-ROM into the PC. The main CD window will open. Click on “Printer
Software” to access the software installers. Follow the instructions on-screen to run through the
installation process.
For additional information regarding software installations (including illustrated step-by-step
instructions), refer to the Getting Started Guide that shipped with the printer, or the Windows
Software Installation Guide PDFs on your CD-ROM.
Installing Printer Drivers for MacOS
To install printer drivers for MacOS, insert the Elite Color 16 Series CD-ROM into the Macin-
tosh. Open the CD window and double-click the “Elite Color 16 Series Installer” icon. Follow
the instructions on-screen to run through the installation process.
For additional information regarding software installations (including illustrated step-by-step
instructions), refer to the Getting Started Guide that shipped with the printer, or the Macintosh
Software Installation Guide PDFs on your CD-ROM.


