Chapter 3 Enabling Auto Clean 67
Chapter 3
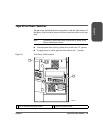
The Auto Clean feature is automatically enabled if you load even one cleaning
cartridge into the reserved cell area and then reset the library.
For instructions on how to use the CAP to insert cleaning cartridges, see
Importing Cleaning Cartridges through the CAP on page 105. For the
location of the reserved cells, see Reserved Cells on page 24.
To install cleaning cartridges in the reserved cells:
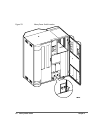
1. Unlock and open the front doors (see Opening the Library Front Doors on
page 122).
2. Verify that the cleaning cartridges are right side up (the VOLSER numbers
should be closest to the top edge and facing outward).
Caution Potential static electricity damage to electrical components. Take
precautions against electrostatic discharge by touching gray,
unpainted metal (such as the library’s frame) before reaching
into the library. Avoid touching any electrical component.
3. Place a cartridge into any of the 11 designated cells.
4. Close and lock the front access door.
Note You may follow this same procedure to load diagnostic
cartridges into the reserved cells. (Every diagnostic cartridge has
“DG” as the first two letters of its VOLSER.) However, loading
diagnostic cartridges alone does not enable Auto Clean.


