HP OmniBook 2100/3000/3100 Troubleshooting and Diagnostics 3-3
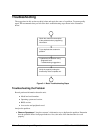
• Separate Problems. If there is more than one symptom, separate them into distinct problems.
•
Consider Causes. Keep in mind possible causes for each problem. Use the diagnostic tools and
troubleshooting suggestions to help find possible causes.
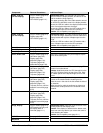
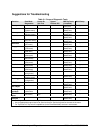
The OmniBook diagnostic program is the primary troubleshooting tool—it tests most
components using automatic and interactive tests. The table on page 3-4 shows how you can
use the different diagnostic tools to isolate the cause.
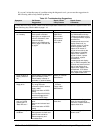
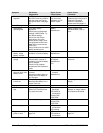
The troubleshooting suggestions on page 3-5 include general suggestions for repairing units
with certain failure symptoms.
Swapping easily replaced modules with known-good modules is an ideal way to isolate the cause
down to the module level. It is rare for more than one module to be responsible for one failure
symptom. Therefore, replacement of more than one module for a particular symptom should be the
exception rather than the normal expectation.
After replacing a module, it is normal for the unit to be in a confused state and lock up when power is
applied. If this occurs, press the system-off button to restart the computer in a known state.
Verifying the Repair
Before returning the repaired unit to the customer, verify the repair by running the following tests:
•
Basic Diagnostic Test. Run the basic test of the OmniBook diagnostic program (page 3-11).
–and–
•
Function Tests. Run tests that check the repaired function, such as in the OmniBook diagnostic
program (page 3-11).
–and–
• Failed Tests. Run any other tests that failed during troubleshooting.


