C-2 Printer Memory and Expansion ENWW
Installing a DIMM
Caution
Static electricity can damage dual
in-line memory modules (DIMMs).
When handling DIMMs, either wear an
antistatic wrist strap or frequently touch
the surface of the DIMM’s antistatic
package, then touch bare metal on the
printer.
If you have not already done so, print a
configuration page to find out how
much memory is installed in the printer
before adding more memory
(page 80).
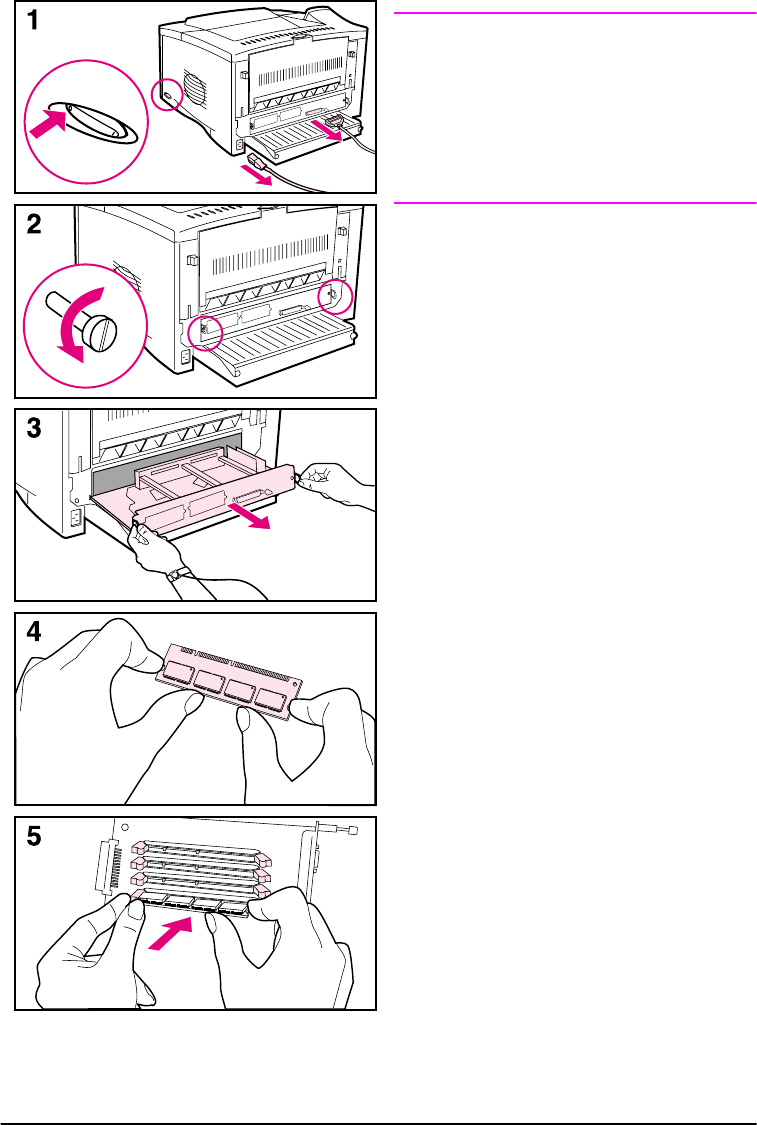
1 Turn the printer off. Unplug the
power cord and disconnect any
cables. (If an optional duplexer is
installed, you will need to remove
the rear section and the cable tray
first. Go to page C-4.)
2 Remove the two captive screws on
the back of the printer.
3 Grasp the tabs and pull the
formatter board out of the printer.
Place it on a flat, non-conductive
surface.
4 Remove the DIMM from the
antistatic package. Hold the DIMM
with fingers against the side edges
and thumbs against the back edge.
Align the notches on the DIMM with
the DIMM slot. (Check that the locks
on each side of the DIMM slot are
open, or outward.)
5 Press the DIMM straight into the slot
(press firmly). Make sure the locks
on each side of the DIMM snap
inward into place. (To remove a
DIMM, the locks must be released.)
A firmware DIMM must be placed in
slot 1 as shown. A memory DIMM


