


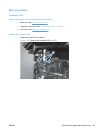
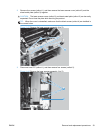
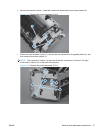


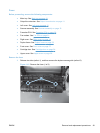

2. Remove two screws (callout 1), and then remove the sheet metal corner brace (callout 2).
Figure 1-49 Remove the pickup assembly (2 of 9)
1
2
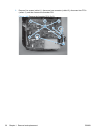
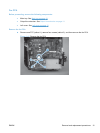
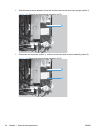
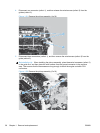
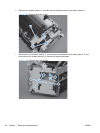
3. Disconnect one connector (callout 1), remove the wire harness from the guides (callout 2), and
then remove five screws (callout 3).
NOTE: The connector in callout 1 is the lower of the two connectors in this area. The right-
most screw in callout 3 is on the front of the product.
Figure 1-50 Remove the pickup assembly (3 of 9)
2
3
1
ENWW Removal and replacement procedures 37