


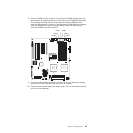
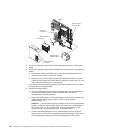
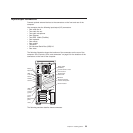
DIMMs
Heat sink
release lever
Heat sink 2
Microprocessor 2
Microprocessor
baffle assembly
Microprocessor
air baffle
VRM for second
microprocessor
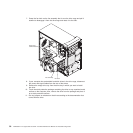
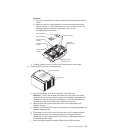
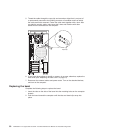
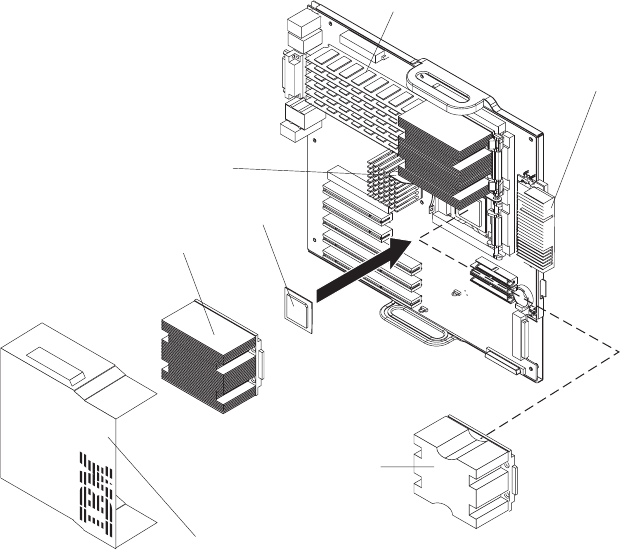
9. Locate the second microprocessor socket (Microprocessor 2) on the system
board.
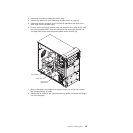
10. Remove the microprocessor baffle assembly from the second microprocessor
socket.
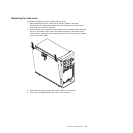
a. Press down on the blue touch point of the heat-sink release lever and
rotate the lever all the way out until it stops.
b. Grasp the front of the microprocessor baffle assembly and tilt it up while
pulling the rear flange out of the heat-sink retention module; then, lift it out
of the computer and store it in a safe place.
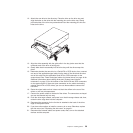
11. If the second microprocessor socket is covered with protective film or a label,
peel and remove the film or label.
12. Install the microprocessor:
a. Touch the static-protective package containing the new microprocessor to
any unpainted metal surface on the computer; then, remove the
microprocessor from the package.
b. Rotate the locking lever on the microprocessor socket from its closed and
locked position until it stops or clicks in the fully open position
(approximately 135°).
Attention: You must ensure that the locking lever on the microprocessor
socket is in the fully open position before you insert the microprocessor in
the socket. Failure to do so might result in permanent damage to the
microprocessor, microprocessor socket, and system board.
c. Position the microprocessor over the microprocessor socket. Align the
triangle on the corner of the microprocessor with the triangle on the corner
of the socket and carefully press the microprocessor into the socket.
46 IntelliStation Z Pro Types 6223 and 6227: Hardware Maintenance Manual and Troubleshooting Guide