


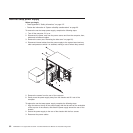


To install the new front fan assembly, complete the following steps:
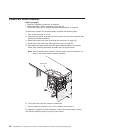
1. Place the fan in position against the chassis.
2. Guide the rubber extensions through the apertures.
3. Use needle-nosed pliers to pull the extensions through the apertures.
4. Connect the fan cable.
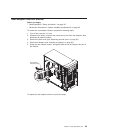
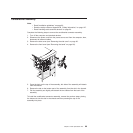
5. Slide the fan baffle into place and guide the tabs into the slots in the chassis
until they lock in place.
6. If you removed the adapters and front I/O card retainer, replace the retainer and
then the adapters.
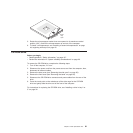
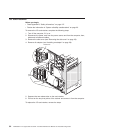
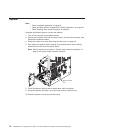
7. Press the touch point on the side of the drive cage and lower it back into place
in the computer.
8. Replace the bezel.
9. Replace the side cover.
Hard drive fan
Before you begin:
v Read Appendix B, “Safety information,” on page 127.
v Review the information in “System reliability considerations” on page 23.
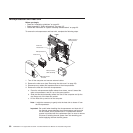
To remove a rear fan, complete the following steps:
1. Turn off the computer, if it is on.
2. Disconnect the power cord from the power source and from the computer; then,
disconnect all external cables.
3. Remove the side cover (see “Removing the side cover” on page 25).
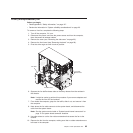
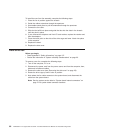
4. Rotate the drive cage up until it locks in position.
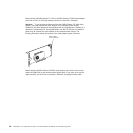
5. Note where the fan cable connects to the system board, and disconnect the
cable from the system board.
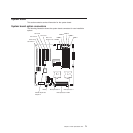
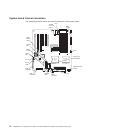
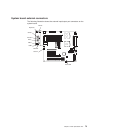
Note: See the system service label or “System board internal connectors” on
page 72 for system board connector locations.
66 IntelliStation Z Pro Types 6223 and 6227: Hardware Maintenance Manual and Troubleshooting Guide