46 Intel
®
Server System SR9000MK4U Product Guide
Hot-swapping a Memory Box
To perform this procedure, you will first need to remove the front bezel. The steps below
will direct you to the instructions on removing the front bezel at the appropriate location
in the step sequence.
Cautions:
• Before hot-swapping the memory box, confirm that hot-swapping can be performed
by checking the following:
— Memory Mirroring” is set to “Enable” as shown in “Memory Screen” on
page 148.
— DIMMs are configured as either of the configuration patterns 3A, 4A, 3B, 4B, or
5B described as “Mirror Mode” in “DIMM Configurations” on page 25.
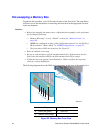
— The green mirror LEDs are turned on. See Figure 35.
• Wear an antistatic wrist strap.
• Be sure to remove/replace only the intended memory box. If the memory box has
failed, then the Attention LED for the failed memory box will be orange.
• Follow the hot-swap sequence described below. Failure to follow the steps may
result in a system malfunction.
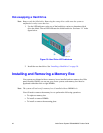
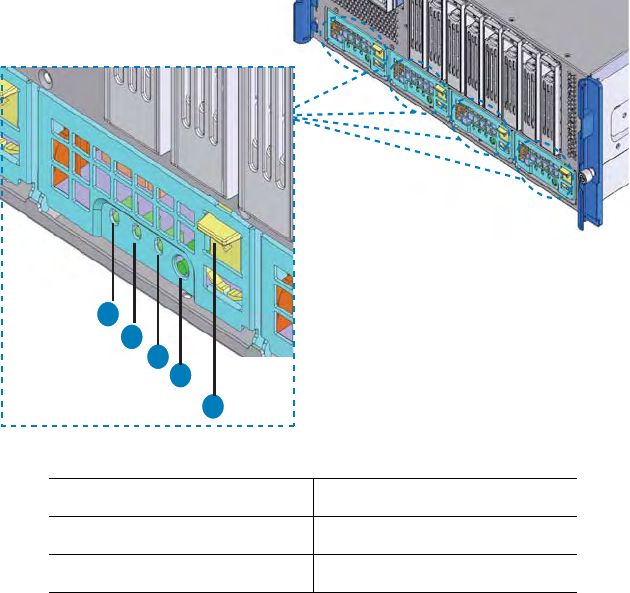
The following diagram shows the LEDs and components on the front of the memory box.
Figure 35. Memory Box Front View
A. Mirror LED (green) D. Hot-swap button
B. Power LED (green) E. Eject lever
C. Attention LED (orange)
AF001123
A
B
C
D
E


